Create a Pipeline for Continuous Deployment
Create a pipeline
-
Click the Create Pipeline button on the pipeline page.
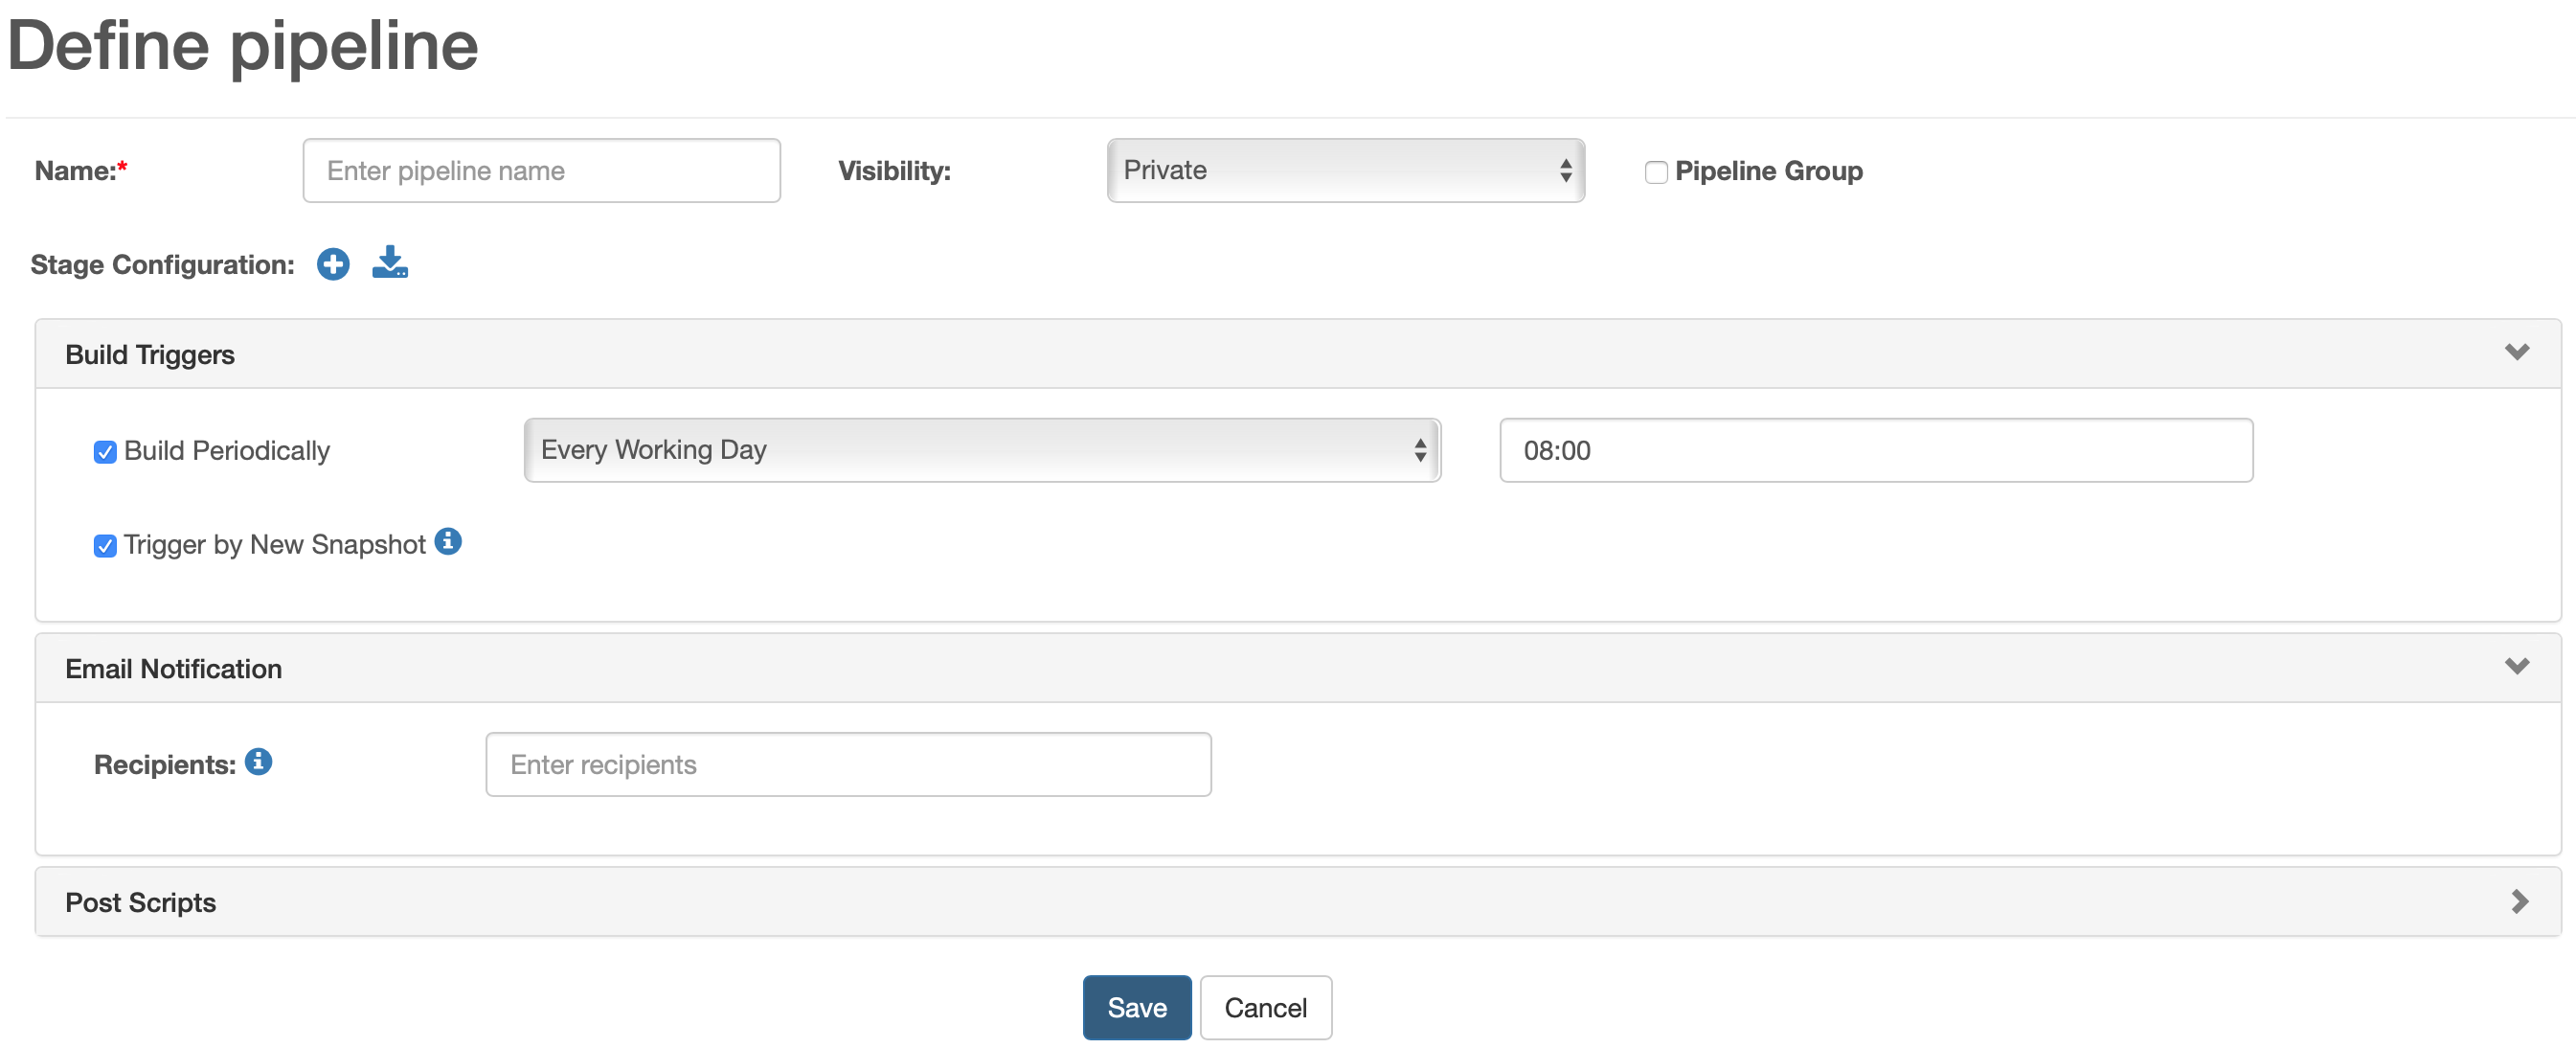 In the Build Triggers section, you can configure how to automatically trigger the pipeline build. Schedule the pipeline build at a specific time by setting the Start Time and schedule periodical builds by setting the Repeat Pattern. Select Trigger By New Snapshot, then a background job will periodically check for new snapshots on the PC server of the first stage (see steps below). If a new snapshot is created on the PC, a new pipeline build will start. The time interval for the background job to query for new snapshots can be set in the Settings tab.
 -
Click the
 icon to add a new stage.
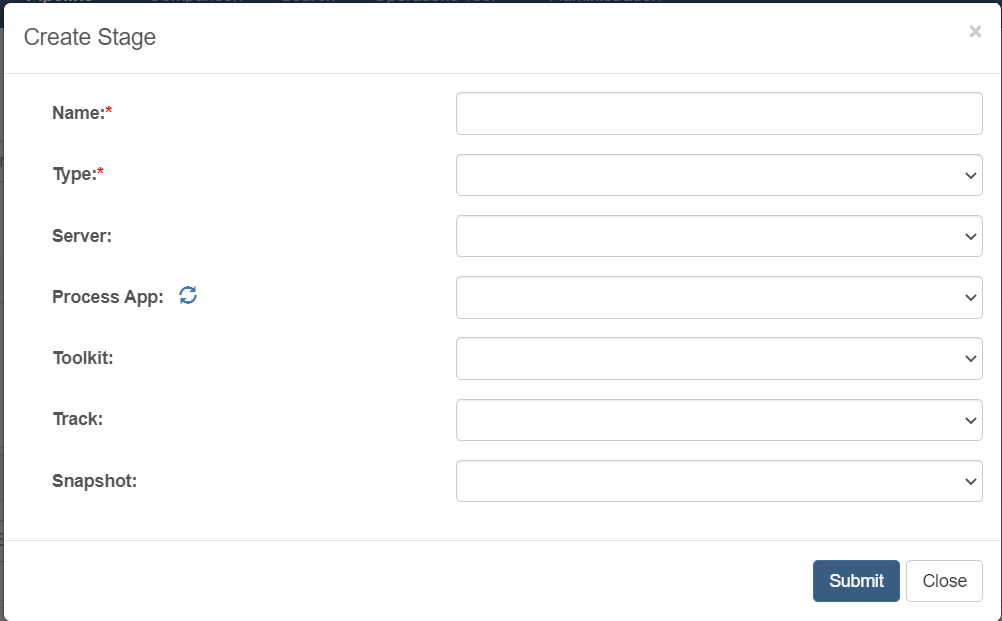
The fields to create a stage are explained below.
Label Description Name The stage name Type The options are Development, Test, Stage, Production, and Utility Server The server environment based on the stage type (the Utility stage type doesn’t have a server) Process App Process apps of the selected server Branch The branch of the selected process app Snapshot The snapshot of the selected branch -
Click the
icon below the stage step to add a new step in the stage.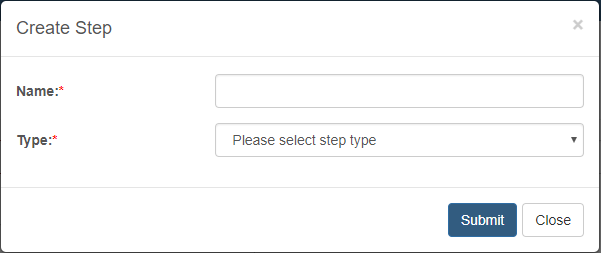
The fields to create a step are explained below.
Label Description Name The stage name Type The options are Snapshot, Deployment, Checkstyle, Test, and Script. In the Development stage, you can choose the step type as Snapshot, Checkstyle, Test, and Script.
In the stages of Test, Stage, and Production, you can choose the step type as Deployment, Test, and Script.
In the Utility stage, you can only choose the step type as Script.
-
Click the
icon to add more stages. Here’s a typical stage’s appearance.
For the first stage, it’s not allowed to change the sequence. However, you can adjust other stages’ sequences by dragging and dropping.
Create a pipeline from a template
-
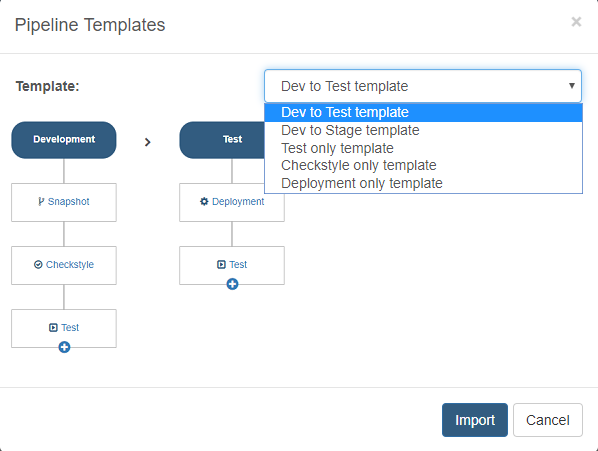
Click the Create Pipeline button on the pipeline page.
-
Click the
 icon to create a pipeline from a template.
 -
There are five built-in templates; you could choose one from the dropdown list.
-
Input the missing values labeled by
 .
.
Edit a pipeline
-
On the pipeline list page, click the pipeline Edit button.

-
Update the pipeline form according to the table shown in the creation section.
Delete a pipeline
On the pipeline list page, click the  button.
Run a pipeline
-
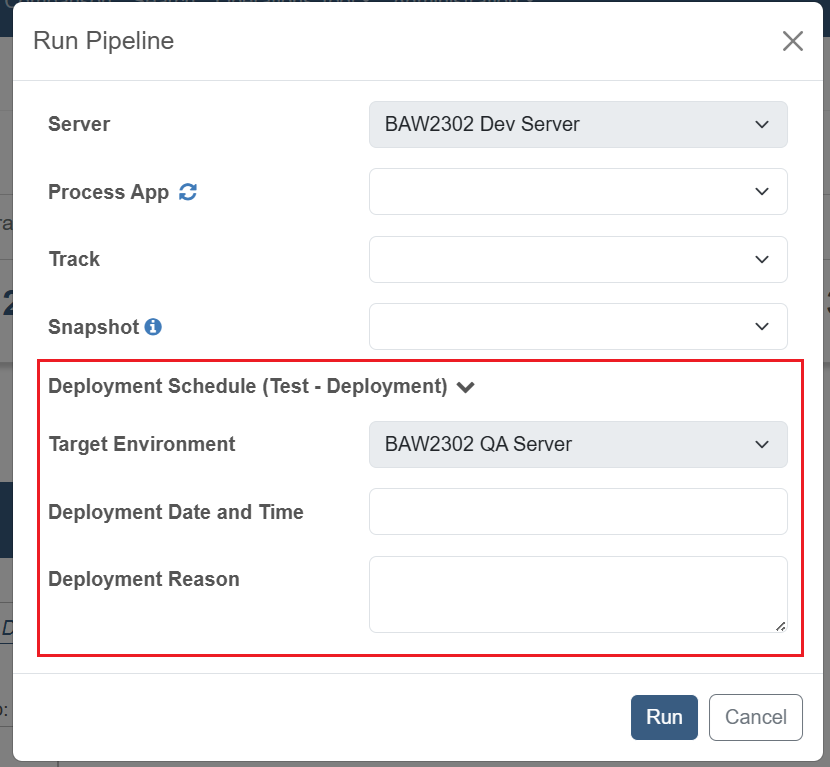
You have two ways to run the pipeline. Firstly, click the pipeline Run button on the pipeline list page. Secondly, enter the pipeline dashboard page and click the Build button.
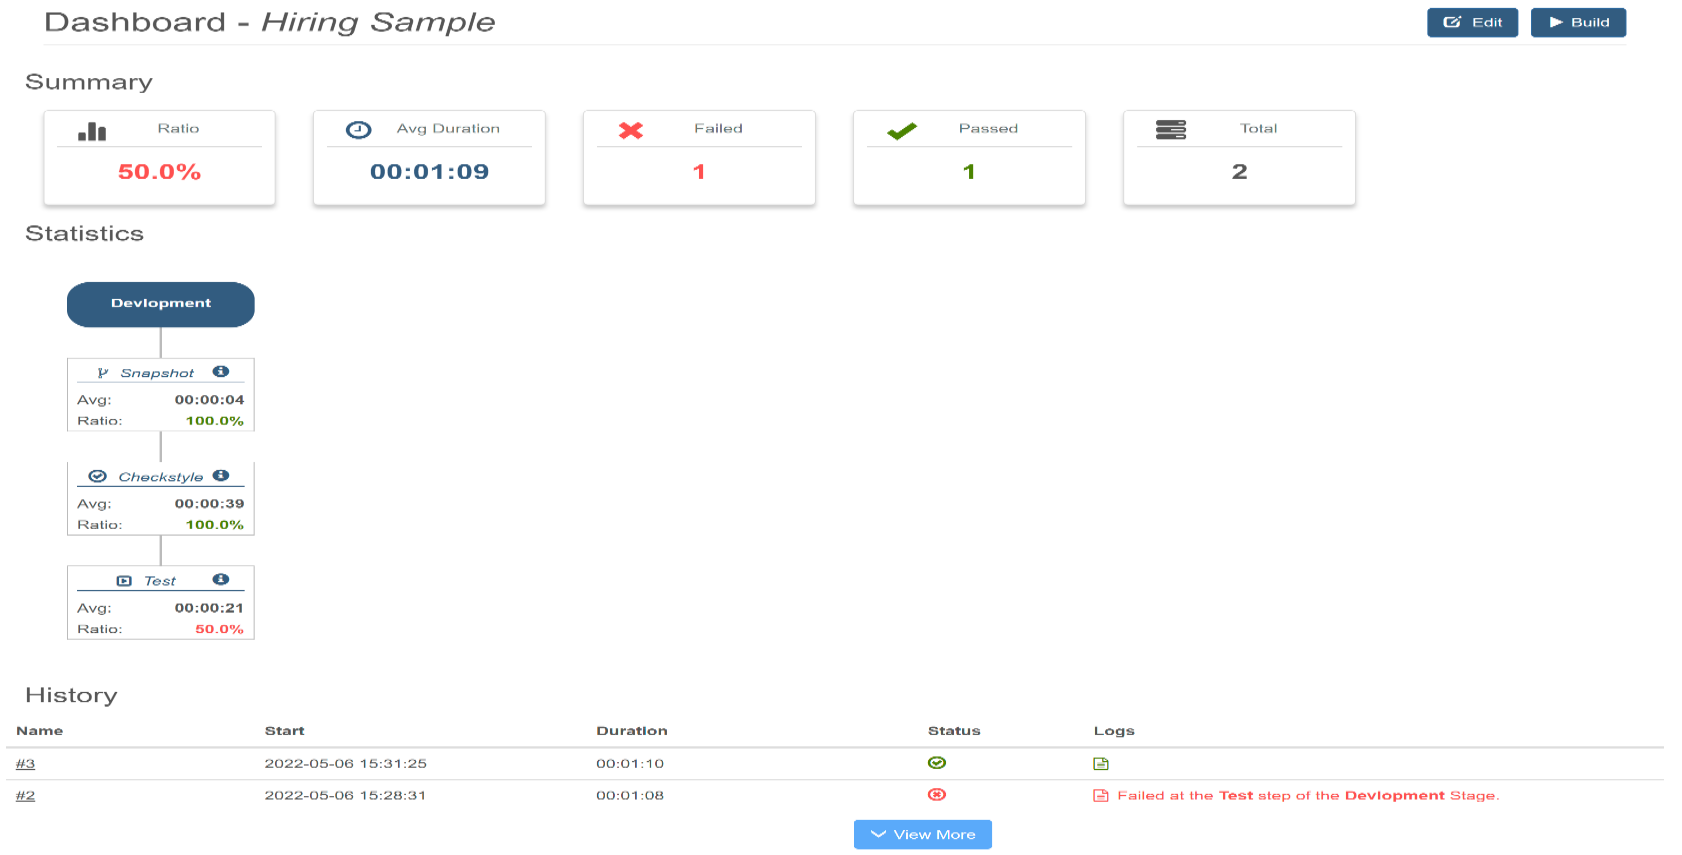
When you run the pipeline, you can select another process app/snapshot to run.
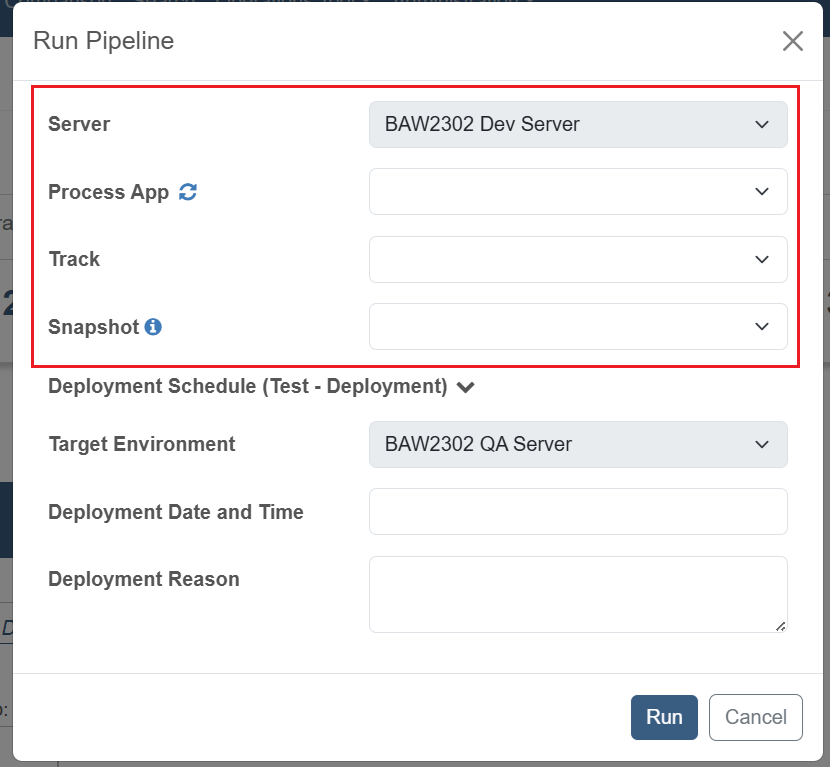
You can also schedule deployment time for any deployment step.
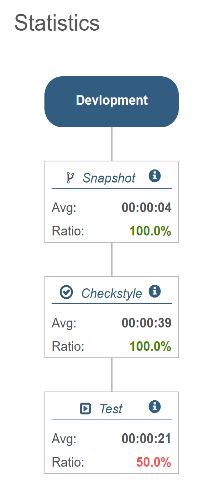
In the statistics section, you could view the average time for each build step and the ratio of completed pipeline builds.
When you run the build, the pipeline build history section will appear with the building status for each stage. You could see the build status, running step, or failed step of each build.

Click the
 at the end of each row to see the build logs in a pop-up dialog.
 -
When the pipeline build is over, the summary information will appear in the pipeline dashboard. The failed step will not be running and won’t have any report. You can click the build name link to see the whole report. Details of the report
Perform deployment from Workflow PC server to PC server
Note:
IDA only supports deploying applications from a Workflow PC server to a PC server between the same versions.
-
Click the Create Pipeline button on the pipeline page.

-
Click the
icon to add ‘Stage1’ and select the “Deployment” type.
-
Click the
icon below the stage step to add the ‘TakeSnapshot’ step in the stage and select the “Snapshot” type.
-
Click the
icon to add ‘Stage2’ and select the “Deployment” type. You could select another Workflow PC server with the same version as ‘Stage1’.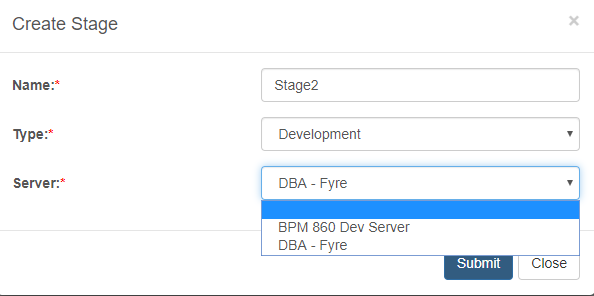
-
Click the
icon below the stage step to add the ‘Deploy’ step in the stage and select the ‘Deployment’ type.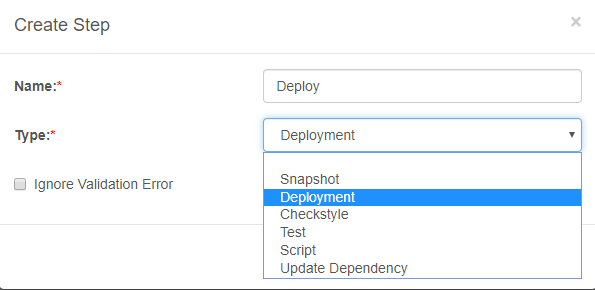
-
Click the “Save” button, and then you could use the pipeline to make a deployment from the PC server to the PC server.