Test Smart Comparison - A New Image-Based Assertion
How Does Smart Comparison Work
Smart comparison is an image-based assertion, which is a new and easy way for regression test assertion by using pixel-by-pixel comparison.
Here are the steps:
- Run and record your test case as usual.
- Review screenshots and enable it as the base image if it’s the expected result. It is recommended to select a specific area in the image to compare, as whole image comparison will report a MISMATCH when screenshots differ in any pixel, for example, scrollbar positions.
- Run the test case again, and then the smart comparison engine will compare the new screenshot with the base image. The test step will be marked as failed with the report showing the “Screenshot does not match the expected image in smart comparison” error if there’s any difference after comparison.
Enable Smart Comparison
Notes: Before starting smart comparison, please make sure that the test case has already finished running with a report whose status shows as Passed. And be sure that there is at least one case step with a screenshot.
-
Go to the test case edit page.
-
Click the Edit button.
-
Click the Smart Comparison button. You can see that all comparable case steps are listed on the left. Choose one and click, you could see its screenshot on the right.
-
Click
 in front of the case step to enable image comparison. The whole image will be compared by default. If comparing the whole image is not what you need, you can specify the area to compare by moving the mouse over the screenshot, then clicking, dragging to select the area you need to compare. Release the mouse, you can see the selected part is shown. It is recommended to select a specific area in the image to compare, as whole image comparison will report a MISMATCH when screenshots differ in any pixel, for example, scrollbar positions.
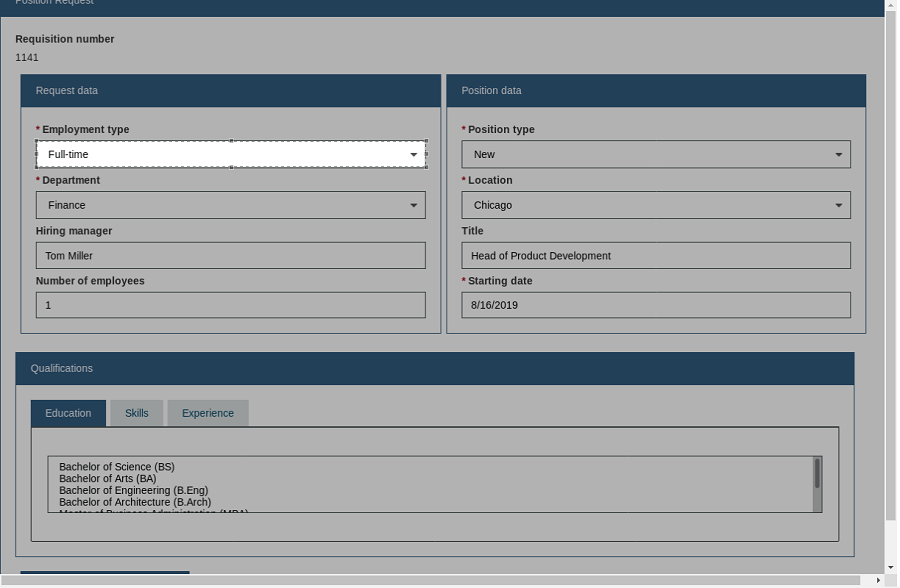
-
If you want to unselect the area, just click any area not being selected. The confirmation form will be shown soon, and click OK. It will switch back to the whole image comparison.
-
Click the « button, and you can go back to the test case edit page.

-
Click the Run button and wait for the report.
-
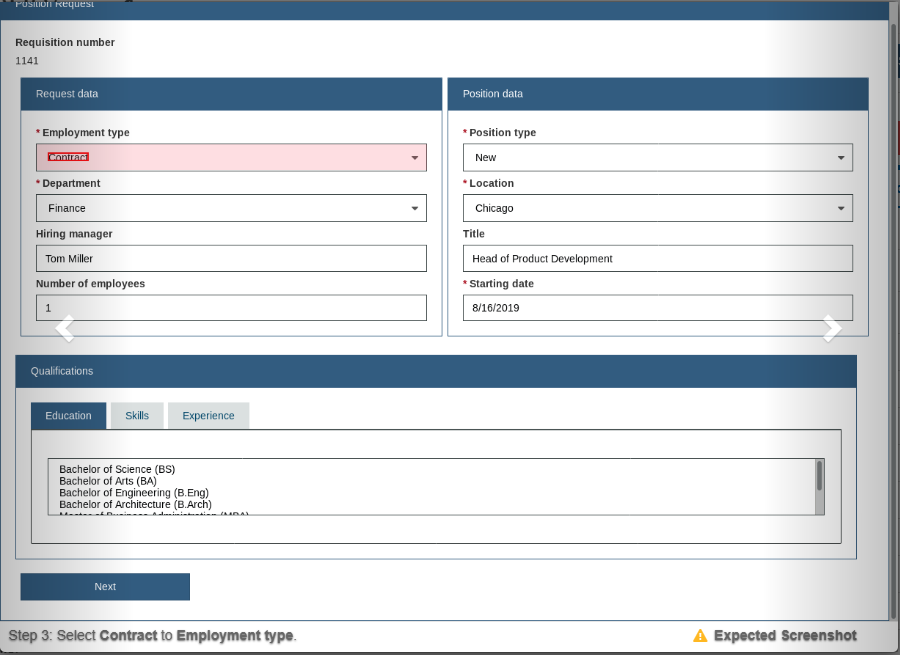
The comparison result will be shown in the report. If MISMATCH, the trace will be:

-
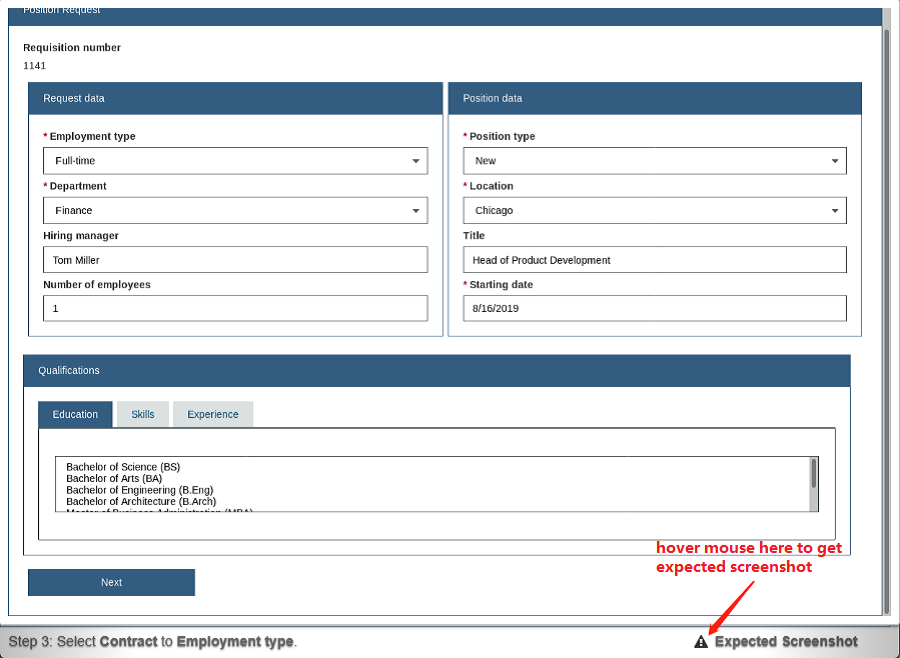
Click the screenshot, the comparison area will be set with a different background color, and the differences between the expected image set in the smart comparison page and the current screenshot will be highlighted in red lines. Hover the mouse over the Expected Screenshot to get the expected screenshot:
If there is nothing different, the current screenshot will be shown, and the status is Passed.
-
If you want to disable image comparison, just click
 in front of the case step again.
Refresh New Screenshots from the Latest Testing Report
Click the Refresh button in the Smart Comparison page to refresh new screenshots from the latest report and reset all saved comparison settings.
Notes:
-
The Refresh button is only displayed when the status of the latest report is Passed and there is at least one case step with a screenshot in this test case.
-
Smart Comparison does not support comparing screenshots taken from different Selenium hubs unless the properties of the Selenium hubs are the same.