Write a Java Command
Software Prerequisites
Prerequisite
- Make sure you have installed Eclipse IDE and Maven in your local environment.
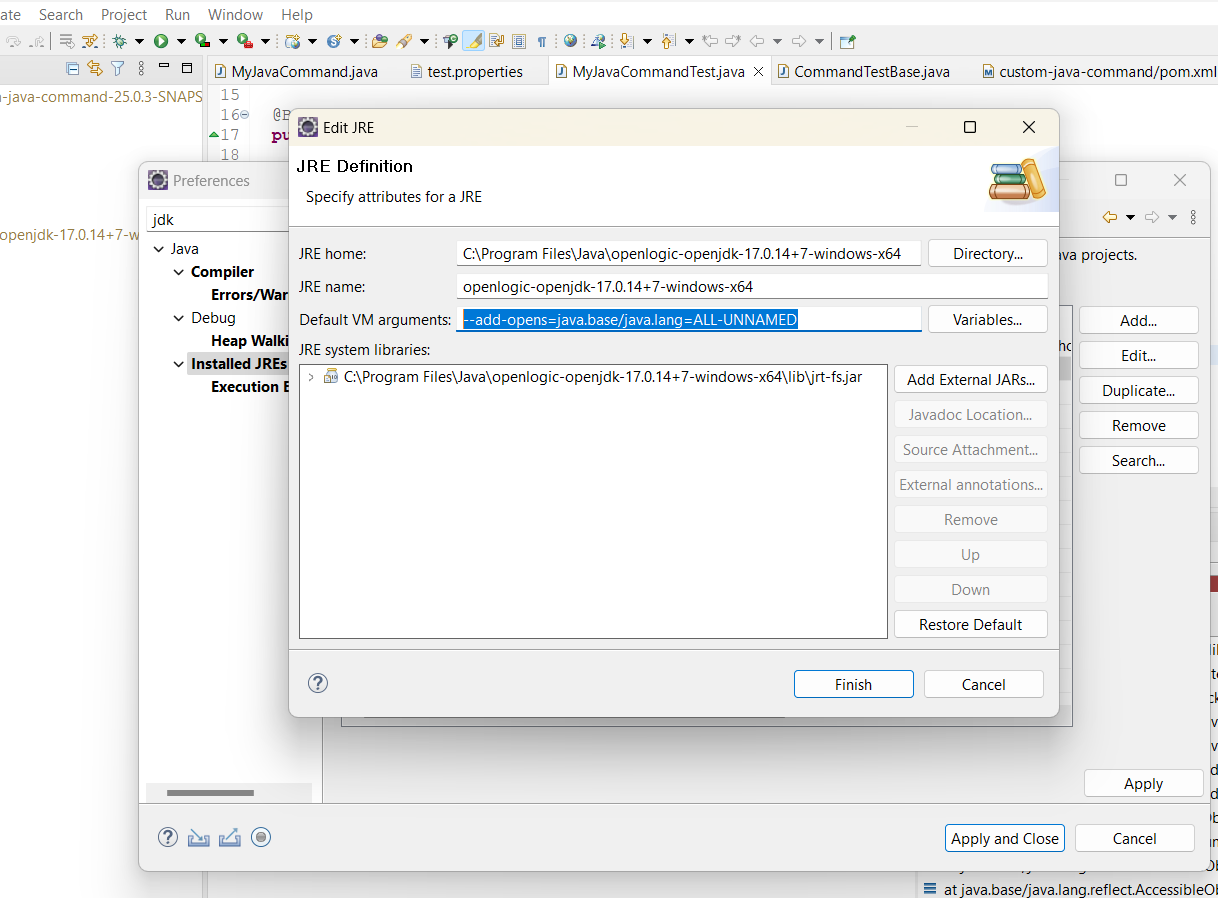
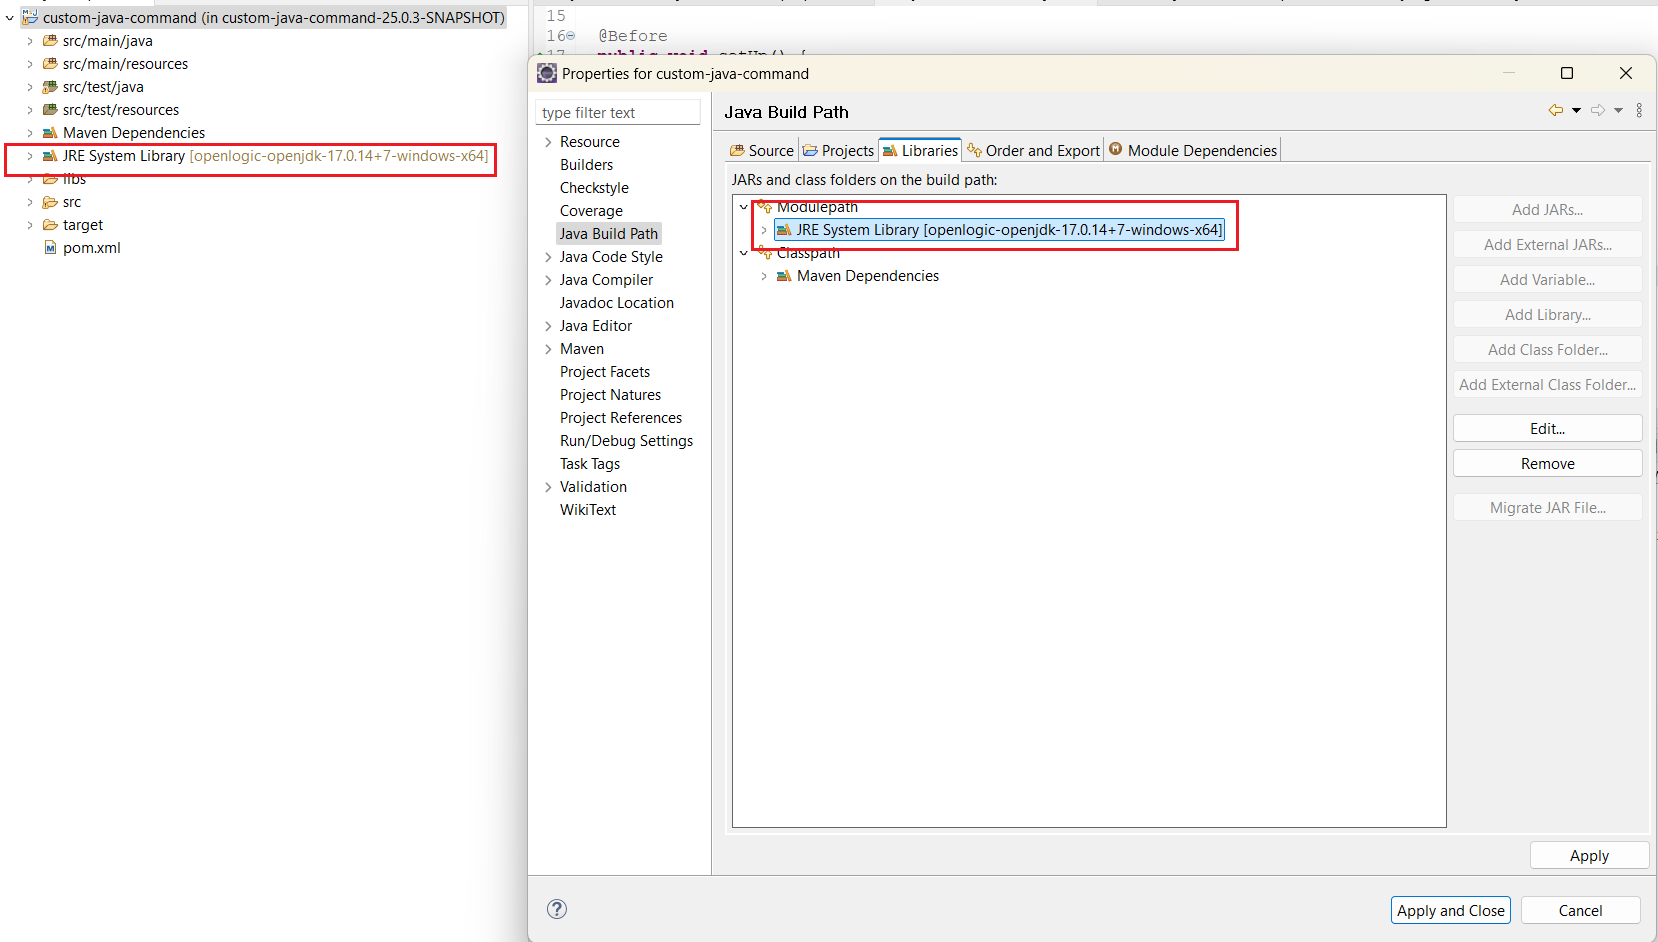
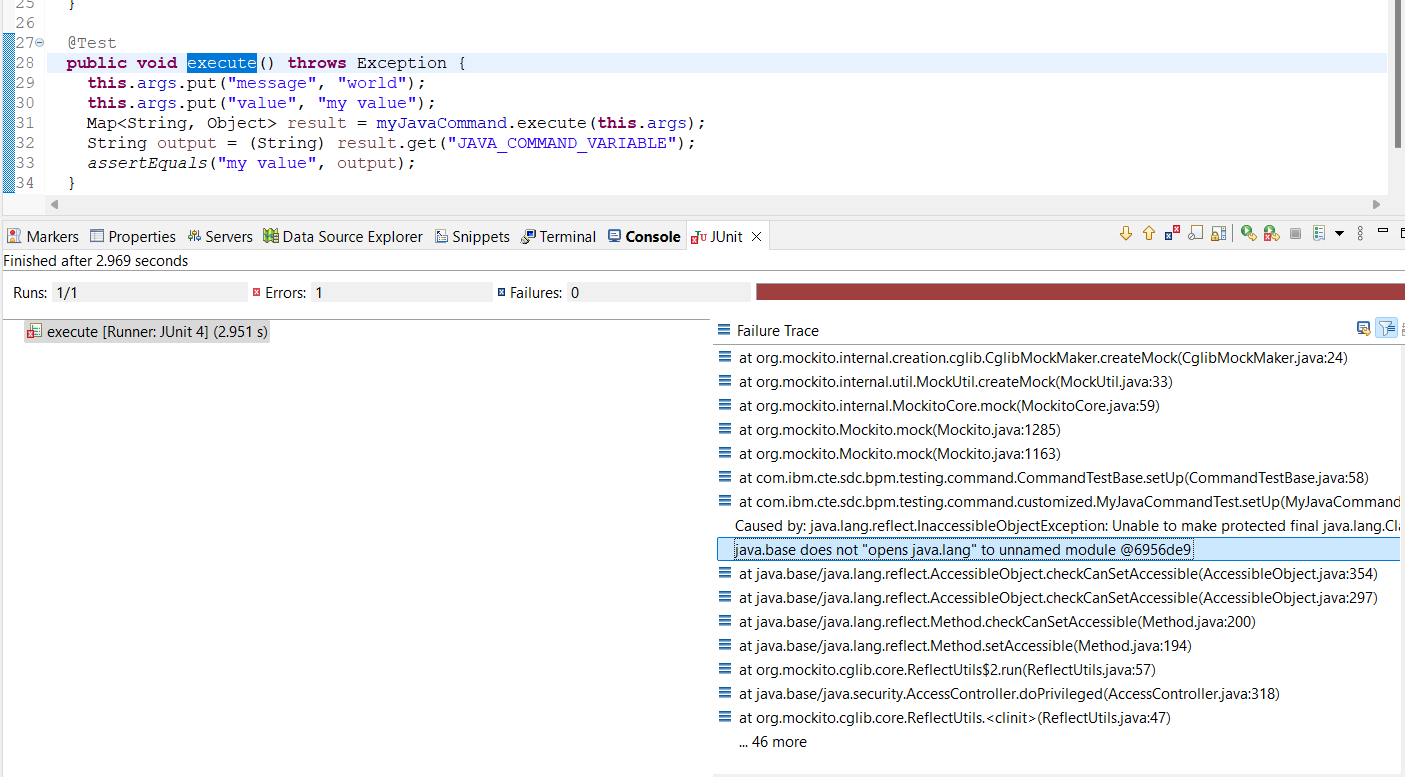
- If your Eclipse IDE’s default JRE is Java 17, please add the JVM argument below to its Default VM Arguments. Make sure your CustomJavaCommand Java project uses the default JRE that is configured.
--add-opens=java.base/java.lang=ALL-UNNAMED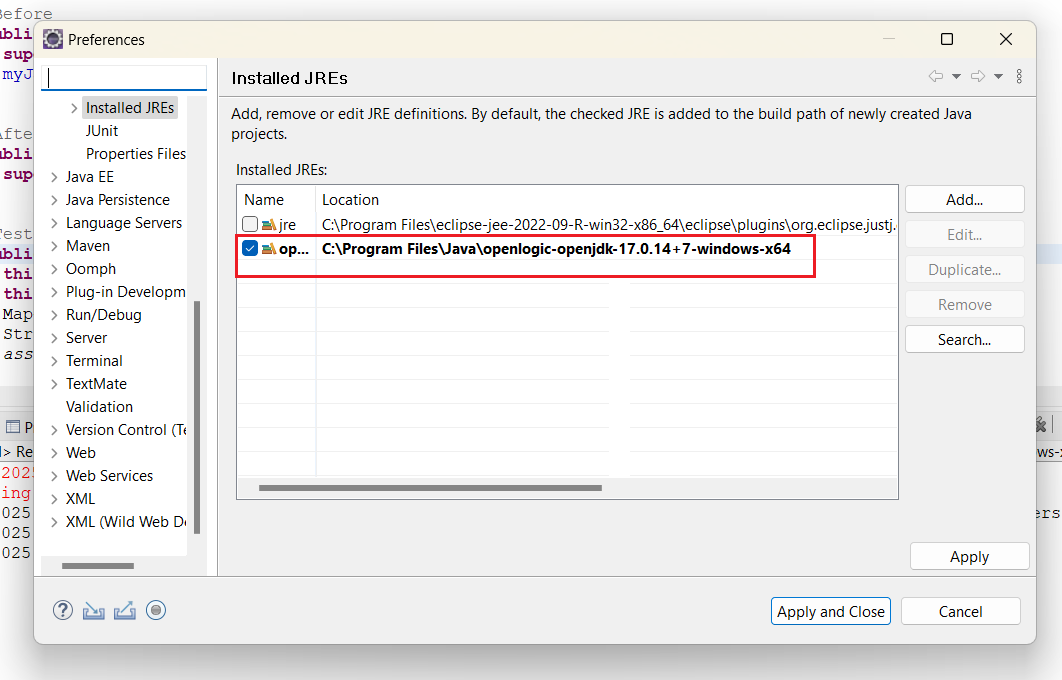
Java command customization
Import CustomJavaCommand Java project
-
Unzip the file workspace/custom-java-command.zip from IDA Resources page.
-
Import the project CustomJavaCommand into Eclipse.
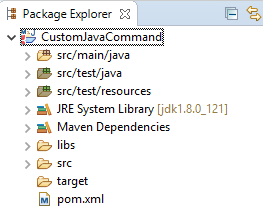
-
Perform Maven Update to load all dependency libraries.
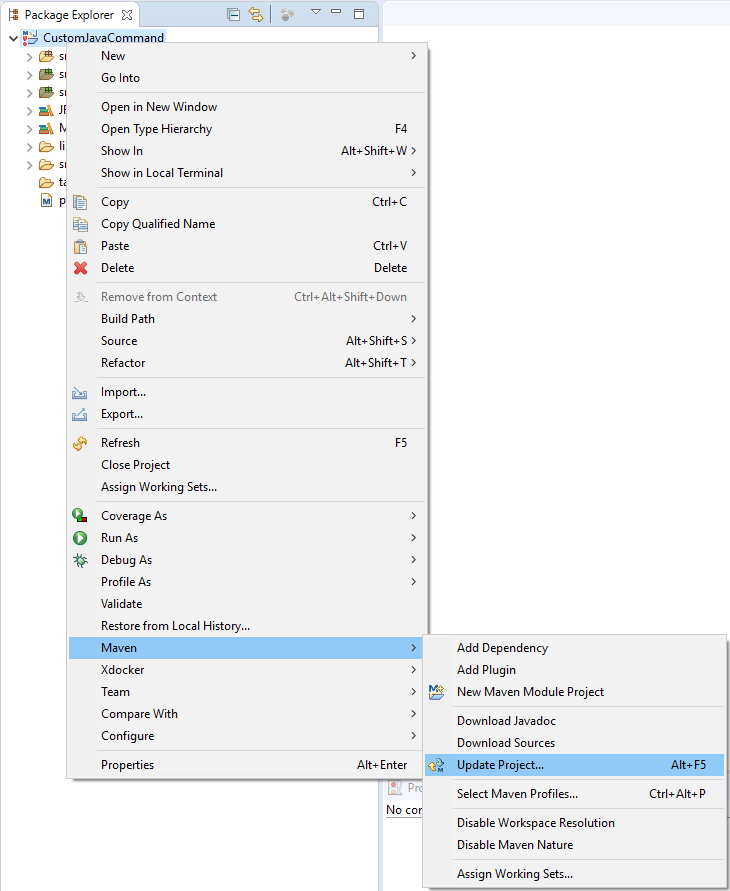
Write custom Java command
-
Create a Java class MyJavaCommand under the source folder src/main/java.
public class MyJavaCommand { } -
Add annotations @CustomCommand and @Parameter on the class, so that the IDA can recognize the Java command. And add private variables based on the parameter definition.
@CustomCommand
- name: The name showing on the test command selection box.
- verbalization: The text showing on the test case detail table.
- description: The text showing on the add/update command dialog.
- takeScreenshot: Indicate whether it will take a screenshot after command execution.
@Parameter
- name: The name getting the parameter from Java code.
- displayName: The name showing on the add/update command dialog.
- type: The control type shows on the add/update command dialog. It supports four kinds of types: text, textarea, combo, and checkbox.
- source: It can be used to configure a list of possible values for the parameter. You can configure a list of possible values for the parameter, separated by a comma.
import org.slf4j.Logger; import org.slf4j.LoggerFactory; import com.ibm.cte.sdc.bpm.testing.command.annotation.CustomCommand; import com.ibm.cte.sdc.bpm.testing.command.annotation.Parameter; @CustomCommand(name = "myJavaCommand", verbalization = "Hello ", description = "execute my java command", takeScreenshot = true) @Parameter(name = "message", displayName = "Message", type = "text") @Parameter(name = "value", displayName = "Value", type = "text", source = "val1, val2, val3") public class MyJavaCommand { private static final Logger logger = LoggerFactory.getLogger(MyJavaCommand.class); private String message; private String value; } -
Extend the Java command from the class com.ibm.cte.sdc.bpm.testing.command.BaseCommand, and override the constructor method and the methods execute and parseArgs from the parent class as below:
public MyJavaCommand(TestDriver driver) { super(driver); } @Override public Map<String, Object> execute(Map<String, Object> args) throws Exception { if (!parseArgs(args)) { logger.error("Cannot execute MyJavaCommand due to invalid args {}", args); this.assertFail("Args invalid", false); } //TODO add your execution logic return this.result; } @Override protected boolean parseArgs(Map<String, Object> args) { super.parseArgs(args); this.message = (String) args.get("message"); this.value = (String) args.get("value"); boolean valid = true; if (StringUtils.isBlank(message)) { logger.error("Wrong args with message {}", message); valid = false; } return valid; } -
By overriding the parseArgs method, you could read the inputs from a Map object and assign the value to the pre-defined private variables. You could also add your own validation logic in the method, and it will be returned as false if the arguments are invalid.
-
By overriding the execute method, you could add your own execution content. An example of the execute method is as follows:
@Override public Map<String, Object> execute(Map<String, Object> args) throws Exception { if (!parseArgs(args)) { logger.error("Cannot execute MyJavaCommand due to invalid args {}", args); this.assertFail("Args invalid", false); } // The driver object can handle the Browser UI, e.g., open a URL this.driver.open("about:blank"); // Invoke BAW Server REST API. TeamworksAPI client = getTeamworksAPI(); client.getSystemDetails(); // Put a variable into the context, so that the variable can be used in other commands. // We need to use the variable by the format ${context.JAVA_COMMAND_VARIABLE} this.result.put("JAVA_COMMAND_VARIABLE", this.value); // Log logger.info("Hello {}", message); return this.result; }- this.driver: It is the object that can handle the browser UI.
- this.getTeamworksAPI(): This method returns an object that can invoke the BAW server REST API.
- this.result: The result of the Java command, and the values in the result will be passed to the following test commands in a test case.
-
Below is a completed example of a Java command; you could also find it in the package com.ibm.cte.sdc.bpm.testing.command.customized.MyJavaCommand
 package com.ibm.cte.sdc.bpm.testing.command.customized;


 import java.util.Map;

 import org.slf4j.Logger;
 import org.slf4j.LoggerFactory;

 import com.ibm.cte.sdc.bpm.testing.command.BaseCommand;
 import com.ibm.cte.sdc.bpm.testing.command.annotation.CustomCommand;
 import com.ibm.cte.sdc.bpm.testing.command.annotation.Parameter;
 import com.ibm.cte.sdc.bpm.testing.driver.TestDriver;
 import com.ibm.websphere.bpm.api.TeamworksAPI;
 import com.ibm.websphere.bpm.util.StringUtils;

 @CustomCommand(name = "myJavaCommand", verbalization = "Hello ", description = "execute my java command", takeScreenshot = true)
 @Parameter(name = "message", displayName = "Message", type = "text")
 @Parameter(name = "value", displayName = "Value", type = "text")
 public class MyJavaCommand extends BaseCommand {

   private static final Logger logger = LoggerFactory.getLogger(MyJavaCommand.class);

   private String message;
   private String value;

   public MyJavaCommand(TestDriver driver) {
     super(driver);
   }

   @Override
   public Map<String, Object> execute(Map<String, Object> args) throws Exception {
     if (!parseArgs(args)) {
       logger.error("Cannot execute MyJavaCommand due to invalid args {}", args);
       this.assertFail("Args invalid", false);
     }

     // The driver object can handle the Browser UI, e.g., open a URL
     this.driver.open("about:blank");

     // Invoke BAW Server REST API.
     TeamworksAPI client = getTeamworksAPI();
     client.getSystemDetails();

     // Put a variable into the context, so that the variable can be used in other commands.
     // We need to use the variable by the format ${context.JAVA_COMMAND_VARIABLE}
     this.result.put("JAVA_COMMAND_VARIABLE", this.value);
     // Log
     logger.info("Hello {}", message);

     return this.result;
   }

   @Override
   protected boolean parseArgs(Map<String, Object> args) {
     super.parseArgs(args);
     this.message = (String) args.get("message");
     this.value = (String) args.get("value");
     boolean valid = true;
     if (StringUtils.isBlank(message)) {
       logger.error("Wrong args with message {}", message);
       valid = false;
     }
     return valid;
   }
 }
Unit test custom Java command
-
Configure test.properties under src/test/resources.
- selenium_hub_url: It’s the selenium grid hub URL. If you don’t have a selenium grid, then you can set up one by the link.
- selenium_hub_browser: The browser type, the value could be iexplore, firefox, or chrome, please make sure the selenium hub can support the configured browser type.
- bpm_server_url: The BAW server URL
- bpm_server_user_name: The BAW REST call username
- bpm_server_password: The BAW REST call password
-
Write a unit test class under the source folder src/test/java, an example is as follows:
package com.ibm.cte.sdc.bpm.testing.command.customized; import static org.junit.Assert.assertEquals; import java.util.Map; import org.junit.After; import org.junit.Before; import org.junit.Test; import com.ibm.cte.sdc.bpm.testing.command.CommandTestBase; public class MyJavaCommandTest extends CommandTestBase { private MyJavaCommand myJavaCommand; @Before public void setUp() { super.setUp(); myJavaCommand = new MyJavaCommand(driver); } @After public void tearDown() { super.tearDown(); } @Test public void execute() throws Exception { this.args.put("message", "world"); this.args.put("value", "my value"); Map<String, Object> result = myJavaCommand.execute(this.args); String output = (String) result.get("JAVA_COMMAND_VARIABLE"); assertEquals("my value", output); } } -
Run the class as JUnit Test
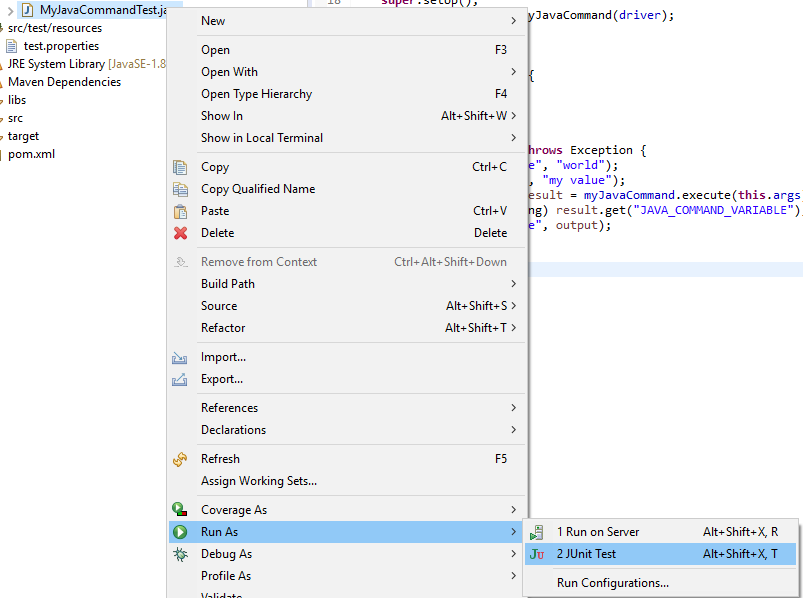
[Java 17] You may encounter error below when running JUnit test in Java 17 environment. To fix the error, configure your CustomJavaCommand Java project’s JRE Default VM Arguments according to Prerequisites.
Package custom Java command
-
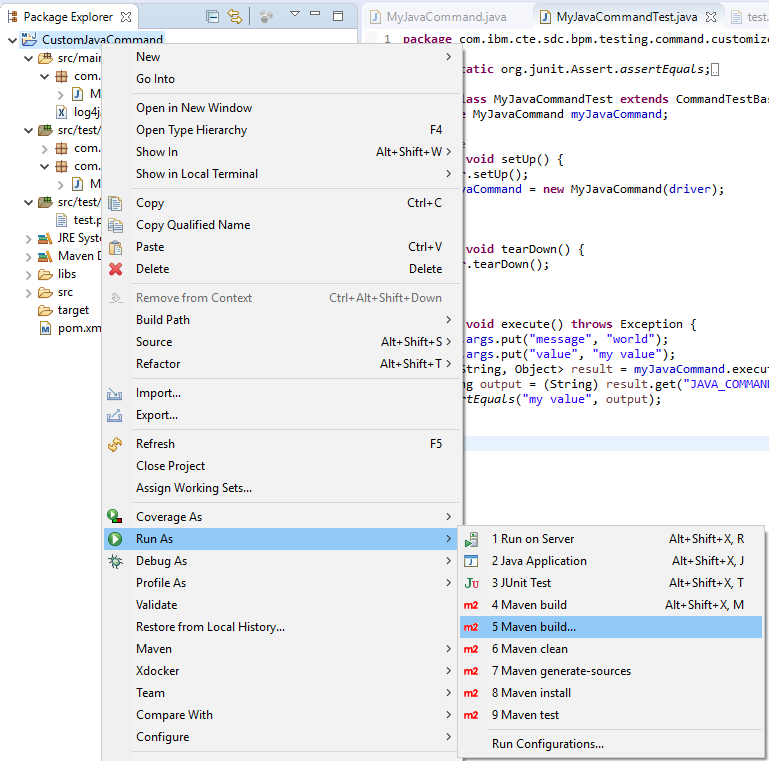
Once all unit test cases are passed, then you could package the Java command by right-clicking the project and choosing Run As -> Maven build….
-
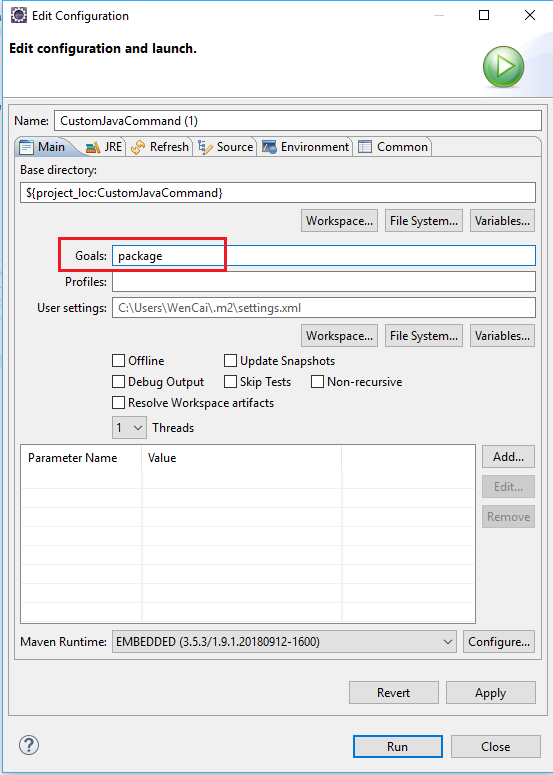
In the Maven build configuration page, enter package in the textbox Goals, then click the Run button.
-
You could find the Jar file at the path target/custom-java-command-1.0.jar, this is the jar we will upload to the IDA application.
- Notes: If you use any Java libraries which are not existing in the as-is IDA.war/lib folder, you need to copy them to the lib folder and repack the IDA web so that the custom Java command jar could find references in the class loader.
Upload custom Java command in IDA
-
Open the page in Administration -> Custom Command.

-
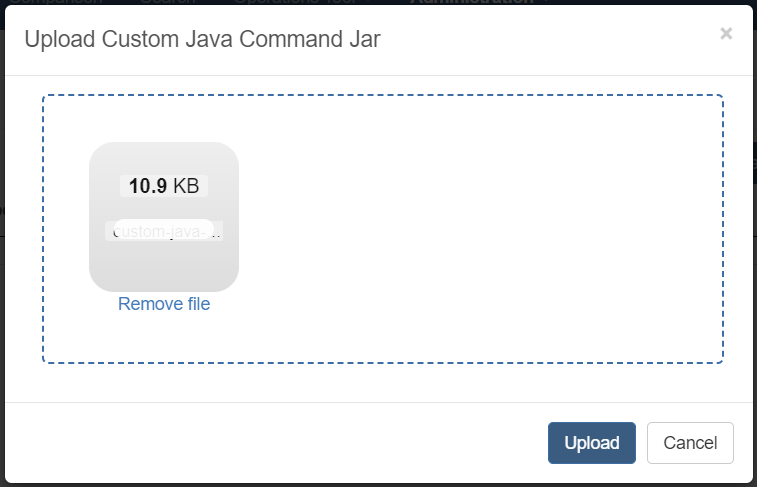
Click the Upload Java Command button, choose the file custom-java-command-22.1.8-SNAPSHOT.jar and upload it.

-
You could see the Java command showing in the table.

Use custom Java command in IDA test case
-
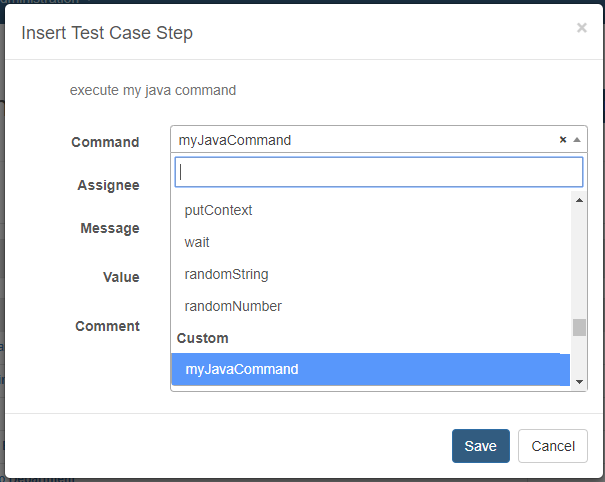
Edit your test case, and open the add/update command dialog. You will see the Java command showing under the Custom category.
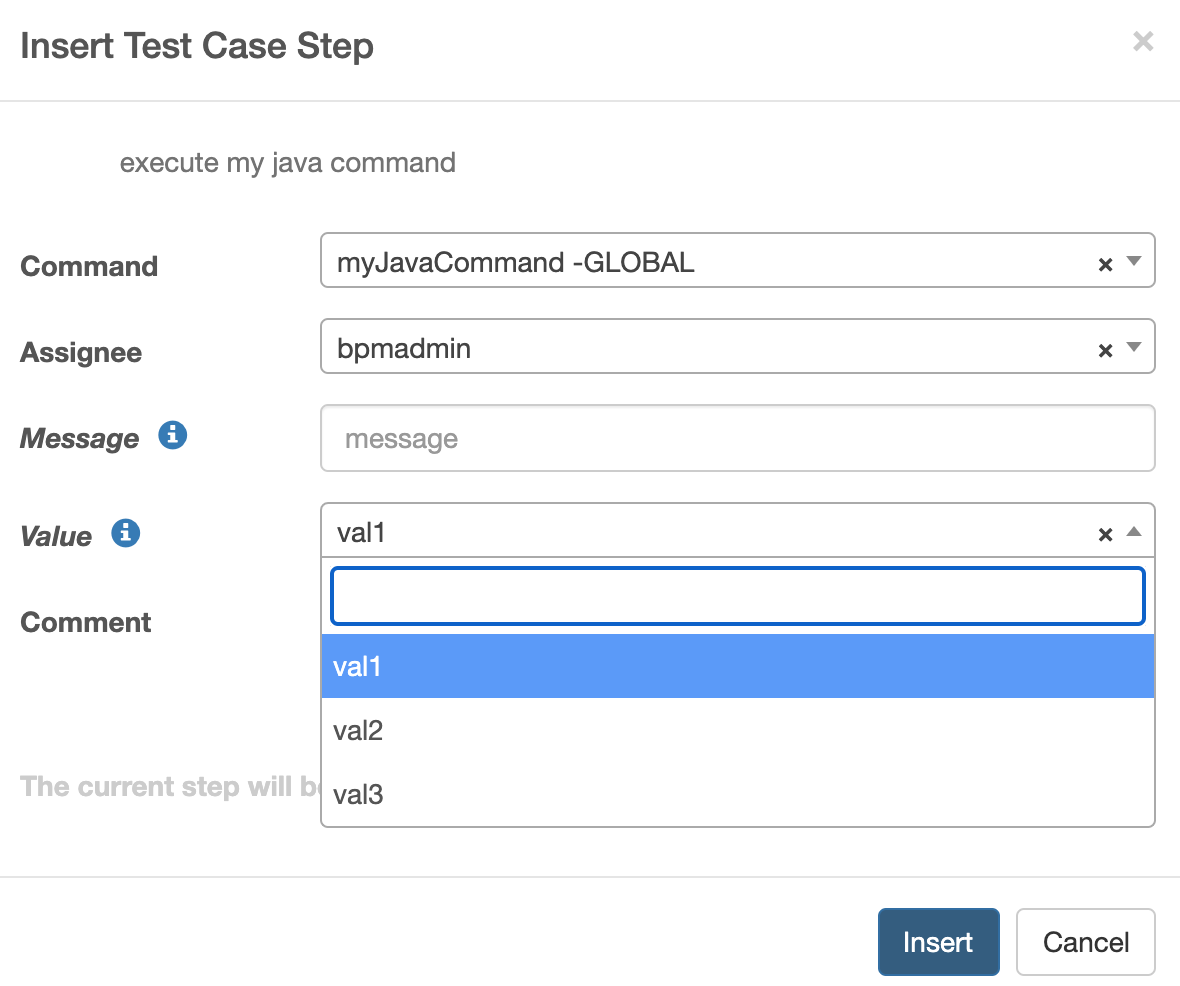
-
The parameters defined by Java annotation are also shown on the command dialog. If you have configured the list of possible values for the parameter, you can select from the parameter dropdown list.
