Database Installation and Configuration
Create Database Tables on IDA startup
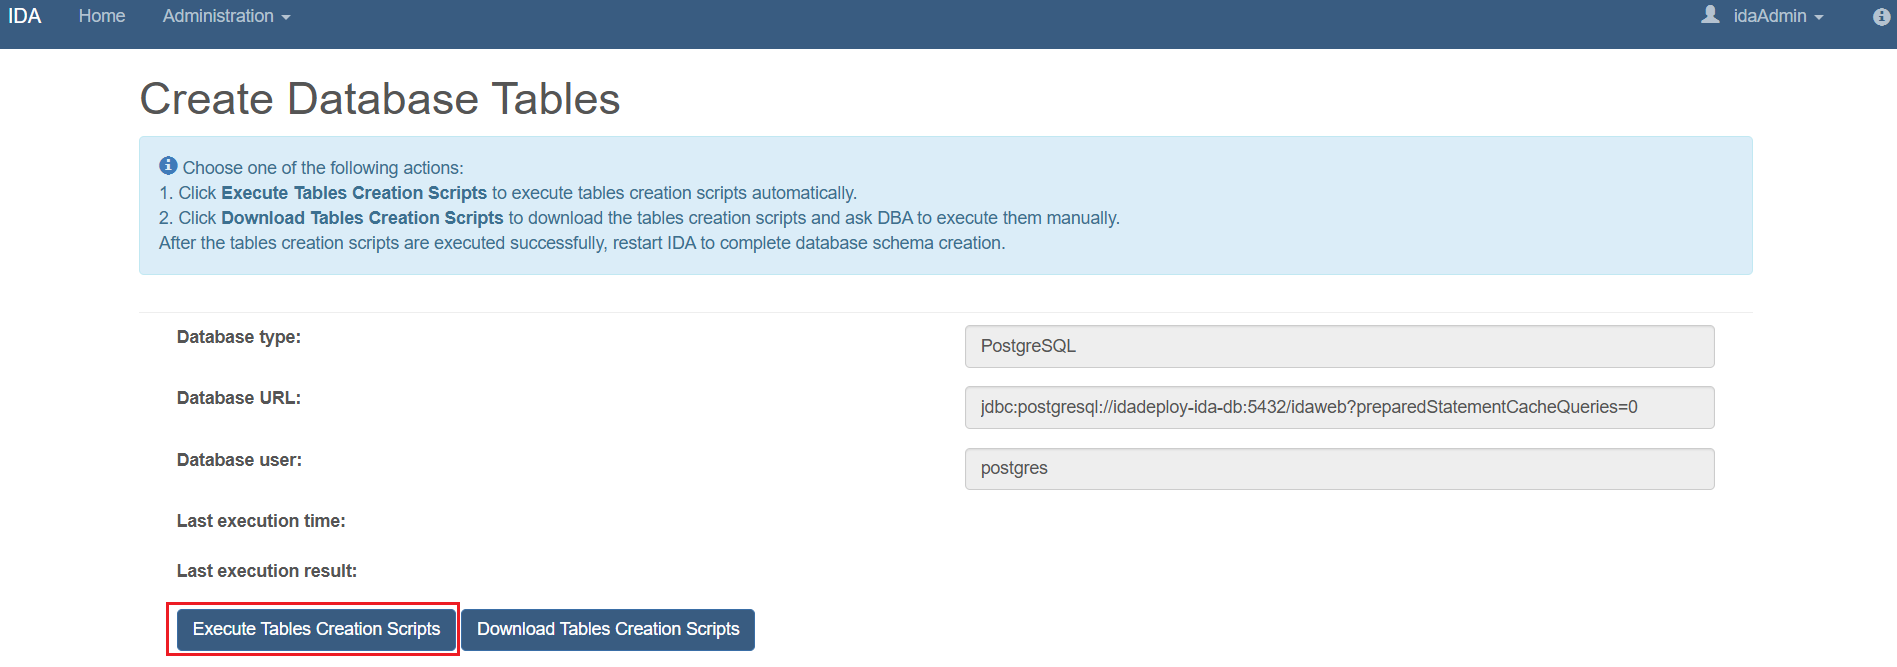
Database creation is a mandatory first step so that you can connect the data source when you install the IDA application. Starting from version 24.0.10, when IDA is newly installed and started up, it automatically checks for database tables creation requirements and redirects IDA admin user to the Create Database Tables page. Alternatively, you can ask DBA to create the database and database tables by running SQL scripts from the IDA release package.
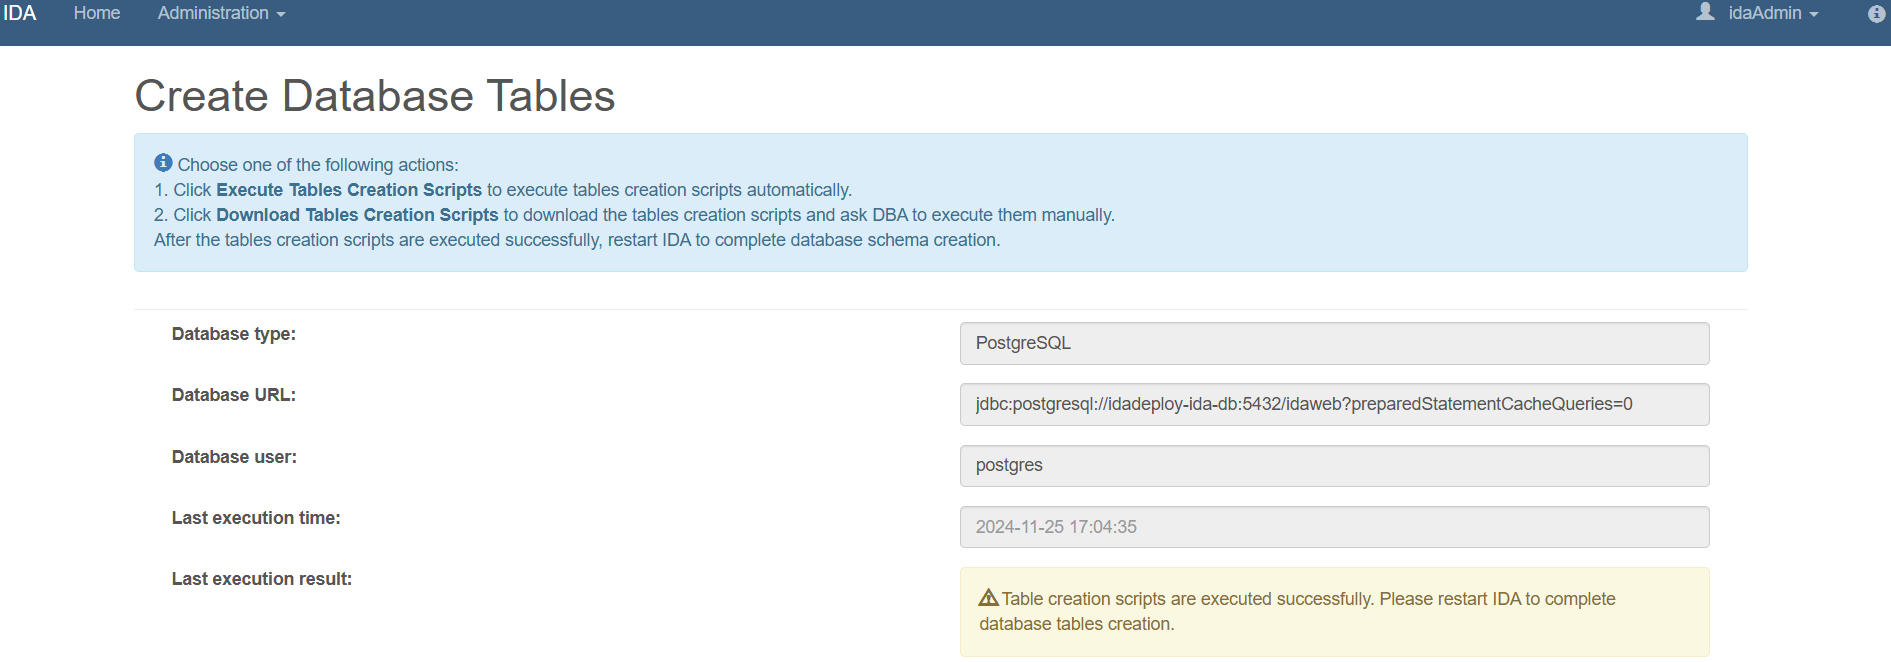
If the Database user shown on the Create Database Tables page has been granted sufficient database privileges(see database and database user creation sample scripts below), IDA admin user can then execute the table creation scripts automatically by clicking Execute Table Creation Scripts. Otherwise, IDA admin user can download the table creation scripts by clicking Download Table Creation Scripts and ask DBA to execute them manually. After the table creation scripts are executed successfully, IDA admin user can restart IDA to complete database tables creation.
Install and Configure DB2
IDA supports DB2 v11.1+. Please refer to the following steps to set up the DB2 environment.
Create IDA Database and Database User
Log in to the DB2 server and execute the following DB2 commands to create the database IDADB and database user idadbadmin with all privileges on the database IDADB.
useradd -s /bin/bash idadbadmin
passwd idadbadmin
su - db2inst1
db2 create database IDADB automatic storage yes using codeset UTF-8 territory US pagesize 32768
db2 connect to IDADB
db2 CREATE BUFFERPOOL BP32K IMMEDIATE ALL DBPARTITIONNUMS SIZE AUTOMATIC NUMBLOCKPAGES 0 PAGESIZE 32 K
db2 GRANT DBADM ON DATABASE TO USER idadbadmin
Download DB2 Driver
You can download the JDBC driver for DB2 based on your DB2 version
Install and Configure PostgreSQL DB
IDA supports PostgreSQL v14.3+. Download and install PostgreSQL. Please refer to the following steps to set up the PostgreSQL environment.
Create IDA Database and Database User
Connect to the PostgreSQL server and use the psql command to create the database idadb and database user idadbadmin with all privileges on the database idadb.
postgres=# create database idadb;
postgres=# create user idadbadmin with encrypted password 'idadbadmin';
postgres=# grant all privileges on database idadb to idadbadmin;
Download PostgreSQL Driver
You can download the JDBC for PostgreSQL v42.2.8.
Install and Configure MySQL DB
IDA supports MySQL v5.7+. Download and install MySQL. Please refer to the following steps to set up the MySQL environment.
Create IDA Database and Database User
Connect to the MySQL server and use the MySQL command to create the database IDADB and database user idaDbAdmin with all privileges on the database IDADB.
mysql> CREATE DATABASE IDADB;
mysql> CREATE USER 'idaDbAdmin'@'%' IDENTIFIED BY 'idaDbAdmin';
mysql> GRANT ALL PRIVILEGES ON IDADB.* To 'idaDbAdmin'@'%';
Download MySQL Driver
You can download the JDBC for mysql v5.1.44.
Install and Configure Oracle
IDA supports Oracle Database Server 12c R2(v12.2.0.1 Enterprise Edition) and 19c(V19.3.0 Enterprise Edition). Please refer to the following steps to set up the Oracle environment.
Create IDA Database Instance
Create a database instance named IDADB based on doc.
Create IDA Database User/Schema
Log in to the Oracle database instance and execute the following commands to create the database user/schema ‘idaDbAdmin’ with the password ‘idaDbAdmin’, with all privileges on the schema. You may use SQL*Plus and use the command ‘sqlplus SYS AS SYSDBA’ to log into the database instance.
alter session set "_ORACLE_SCRIPT"=true;
CREATE USER idaDbAdmin IDENTIFIED BY idaDbAdmin DEFAULT TABLESPACE USERS TEMPORARY TABLESPACE TEMP;
GRANT create session TO idaDbAdmin;
GRANT create table TO idaDbAdmin;
GRANT create view TO idaDbAdmin;
GRANT create sequence TO idaDbAdmin;
GRANT UNLIMITED TABLESPACE TO idaDbAdmin;
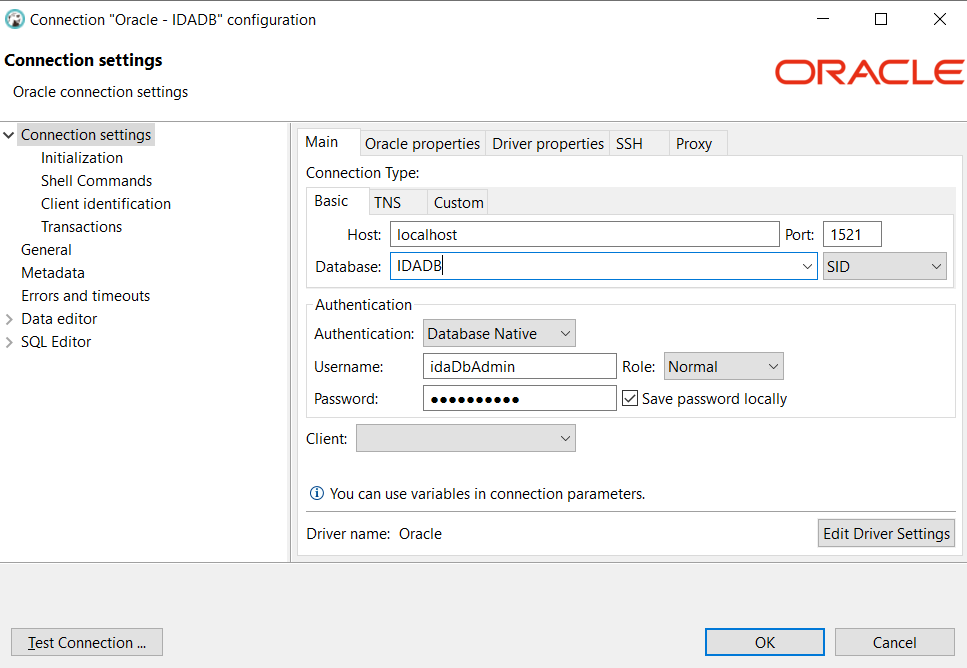
You can use DBeaver to verify that the database and database user are created. The Oracle DB connection information should be configured as follows (replace the Host with your Oracle DB host address):
Download Oracle Driver
You can download the Oracle Database 12.2.0.1 JDBC Driver or the Oracle Database 19c JDBC Driver