Run Load Test
Edit Gatling Home Path
-
Download Gatling v3.6.0.
-
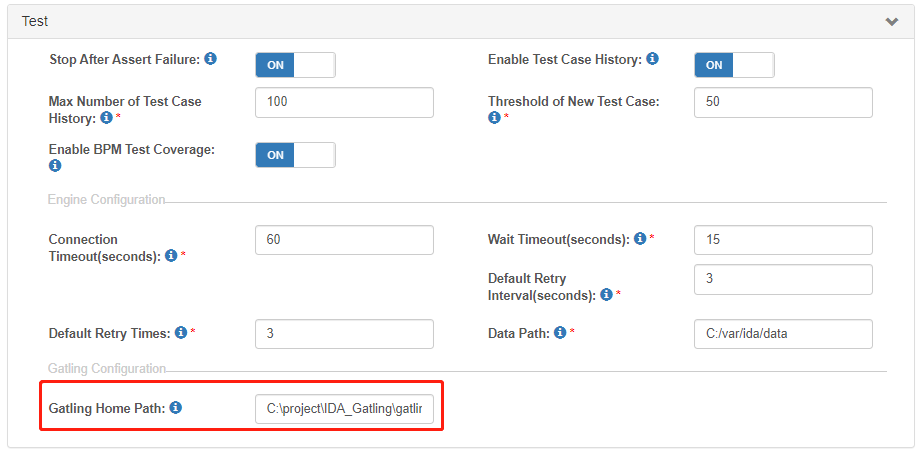
Go to the Settings configuration page under Administration.
-
Type your Gatling installation path in Gatling Home Path or click Download Gatling to download the galting executable.
Import a Sample Test Project
-
Click the Sample Project button in the project tab.

-
Fill in the import form according to the following table.
Parameter Description Server Server environment Process App Process app list of the selected server, default value is “Hiring Sample” Selenium Hub Support Chrome, Firefox Selenium node -
Click the Import button.
-
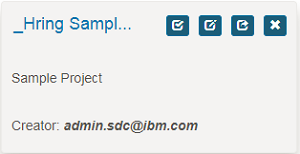
Click _Hring Sample from the project list and enter the project dashboard.
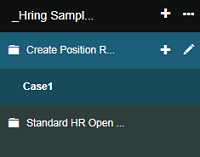
The default sample project contains some test suites, e.g. Create Position Request CSHS and Standard HR Open New Position.
Edit Engine Properties
-
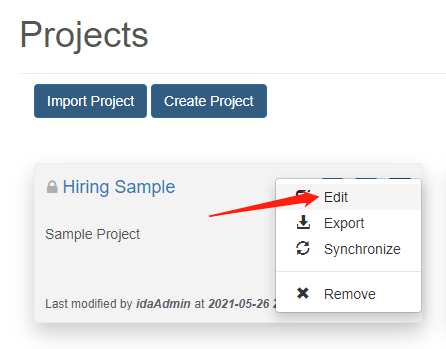
Click the Edit button to edit the project.
-
Click Advance and type the following parameter in Engine Properties:
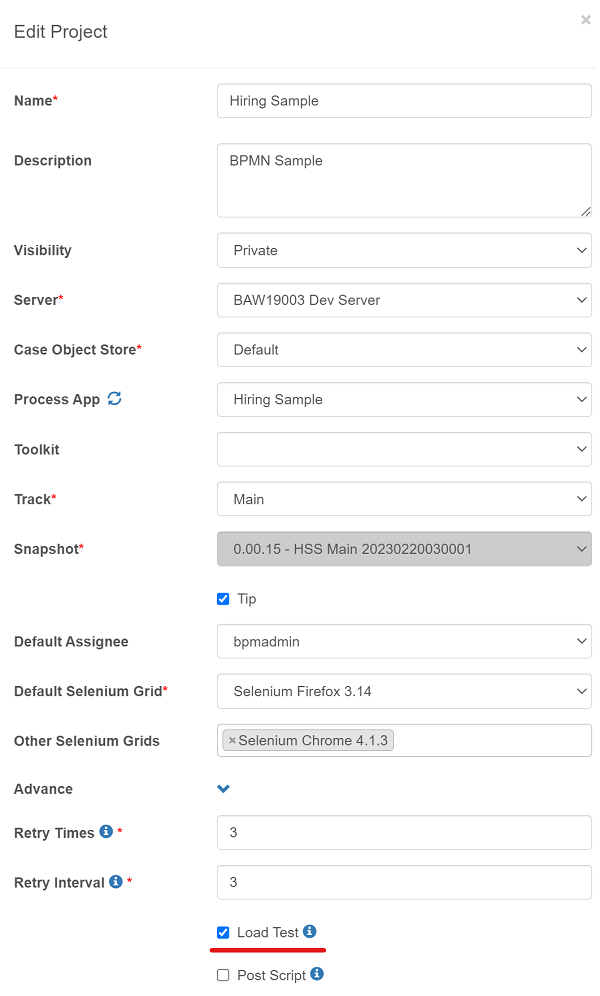
Replay a Test Case
-
Click the project name to get into the project, click the case1 under the Create Position Request CSHS package. Click the Record button on the right of the case name to replay it.
-
Do not click
button. Let it run from the first step to the last step.
-
In the Debug step, which has
 in front of it, the recording will be stopped. You need to click
 button to resume.
-
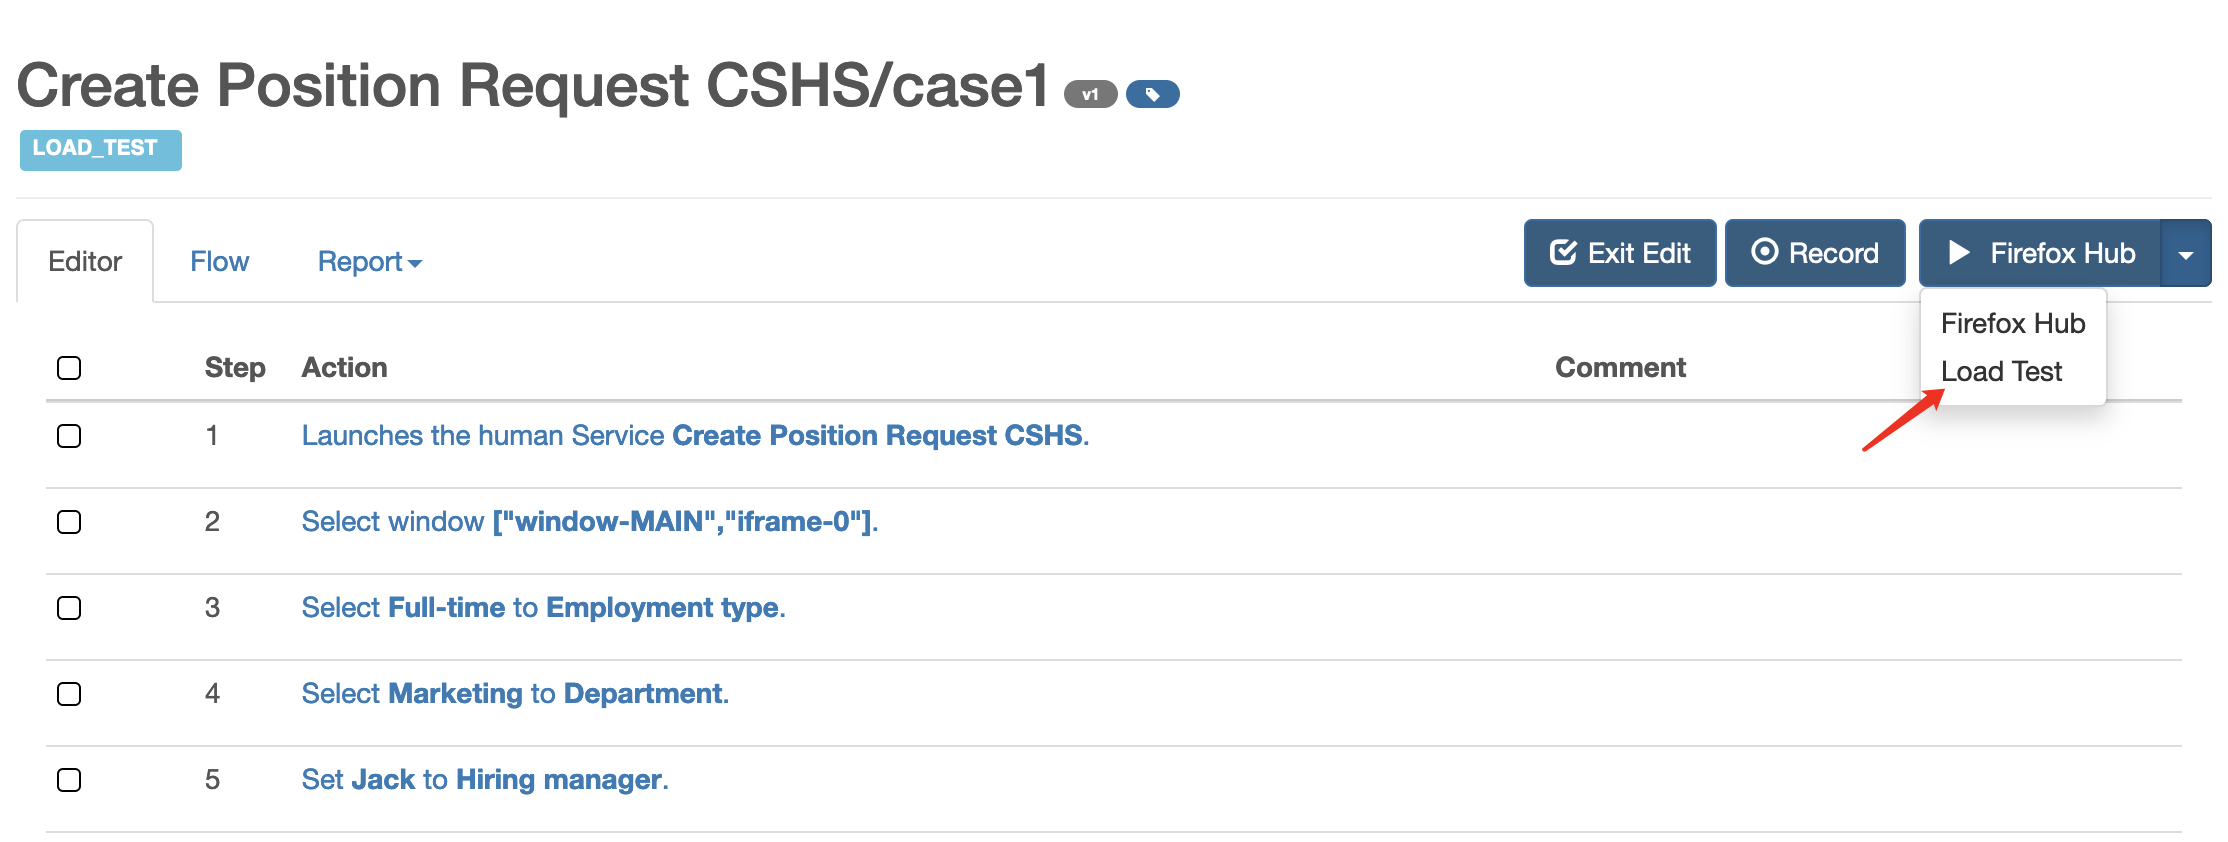
When all the steps are finished, the recorder will automatically close, and there will be an extra button on the page named Load Test. The Load Test button is only displayed after the test case is replayed from the first to the last step.
Run Test Case Load Test
-
Click the Load Test button on the right of the case name.

-
A strategy selection window will pop up. Here, we use the atOnceUsers strategy and set the proper number of users.
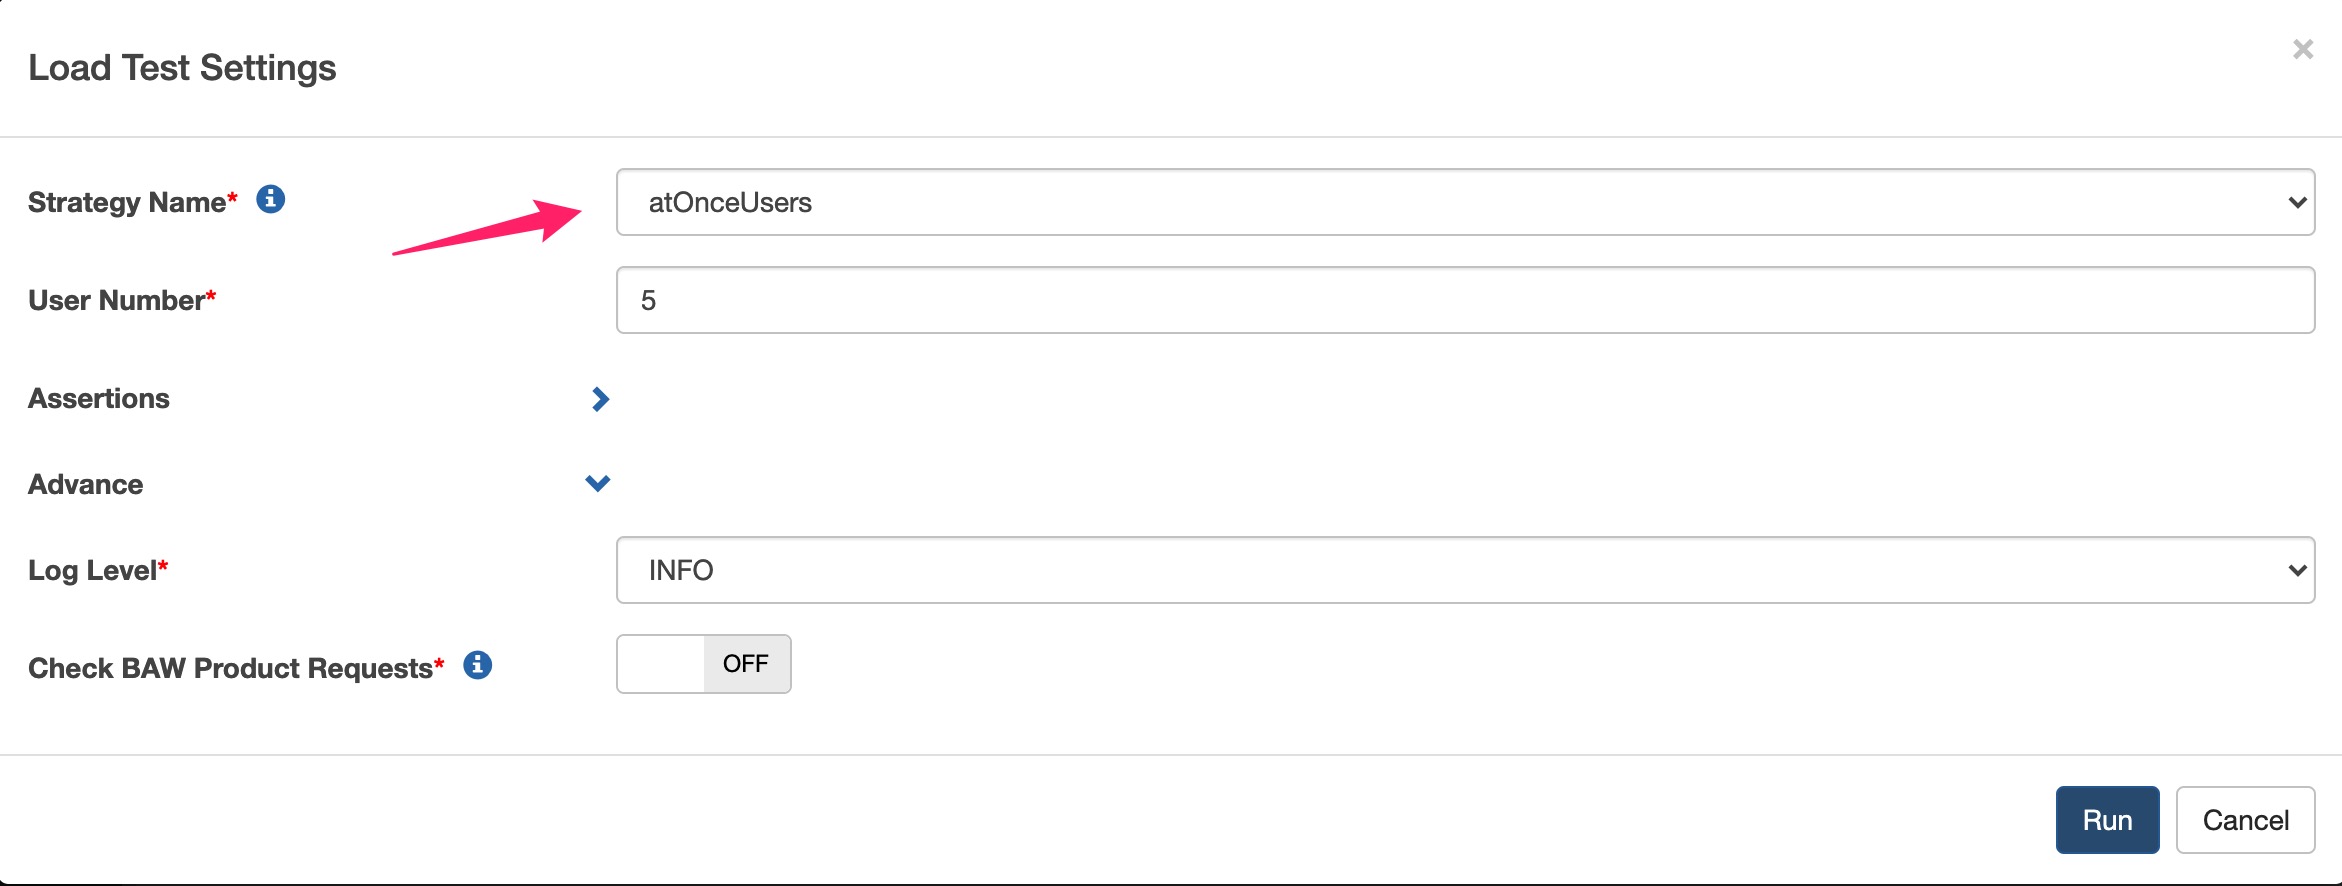
We provide two strategies for usage:
- atOnceUsers(nbUsers): Injects a given number of users at once.
- rampUsers(nbUsers) during(duration): Injects a given number of users distributed evenly on a time window of a given duration.
In the Advanced tab:
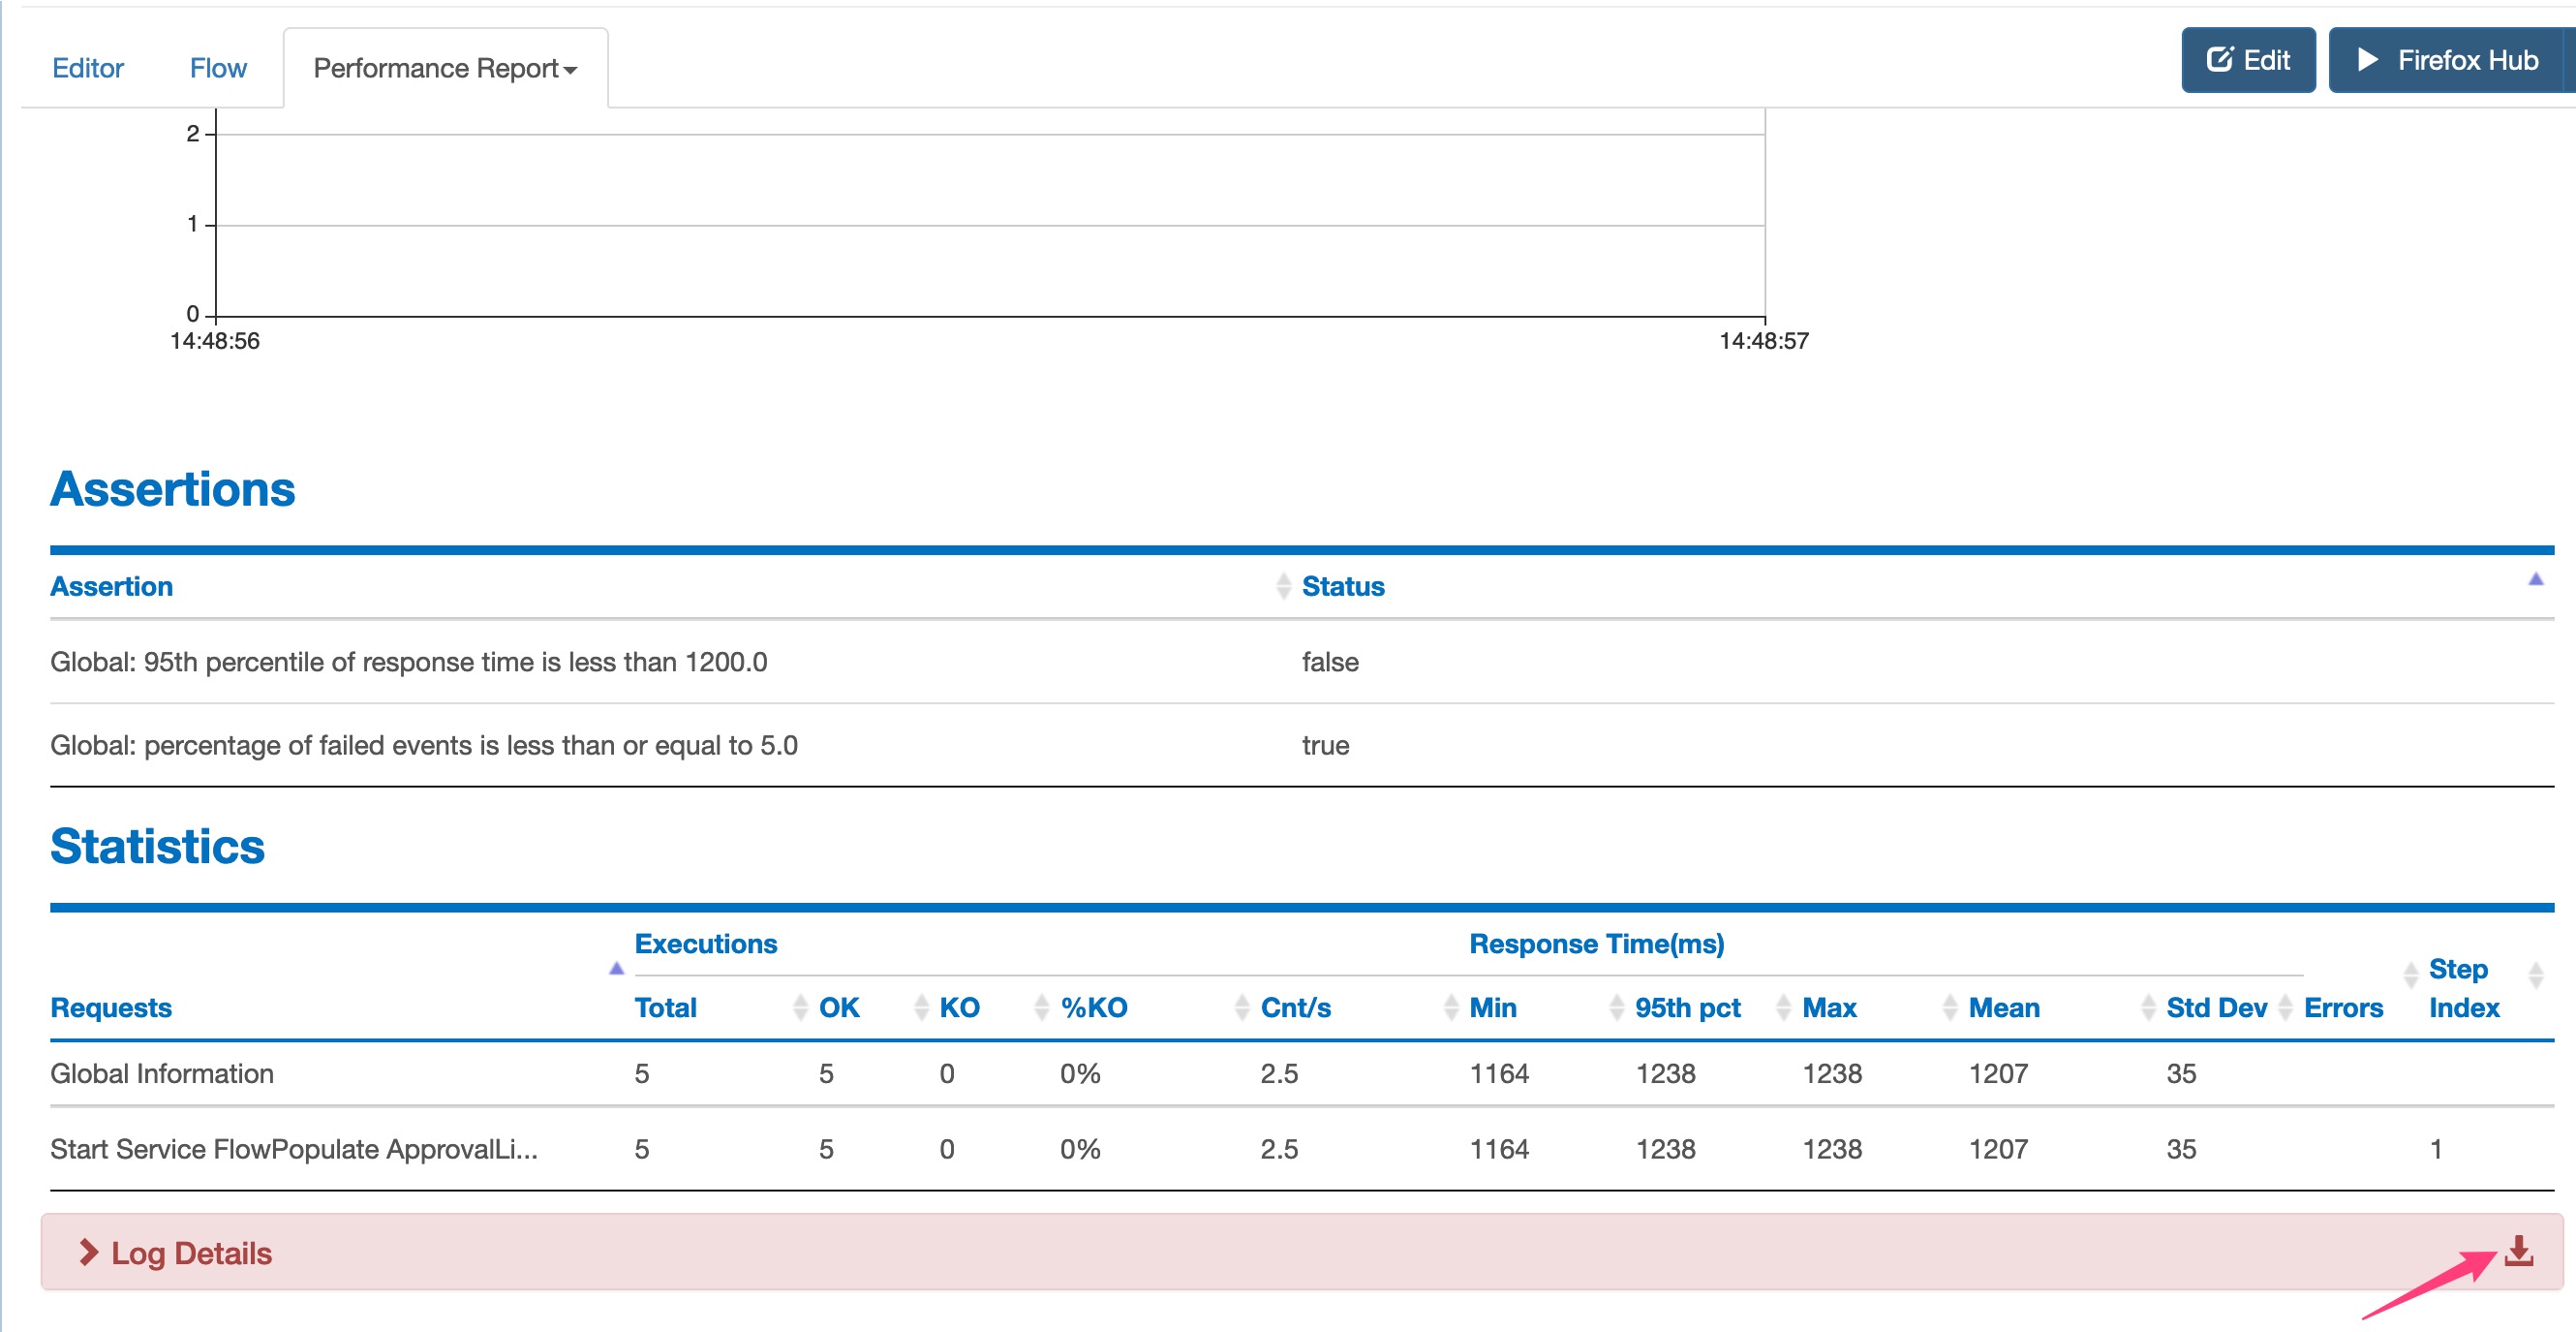
- Change the default assertion value to meet the load case scenario statistics. If any assertion fails, the whole load test case will fail.
- Change the log level for the load testing. You can download the load testing log in the Performance Report tab page.
- Switch on Check BAW Product Requests to include BAW product internal requests (i.e., JS/CSS/Image resources and Portal requests loaded by BAW) in the Load Test Report. The default value is off.
-
Click the Run button to start the load test.
-
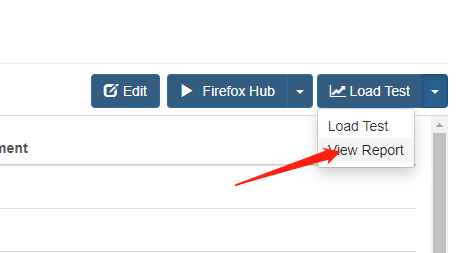
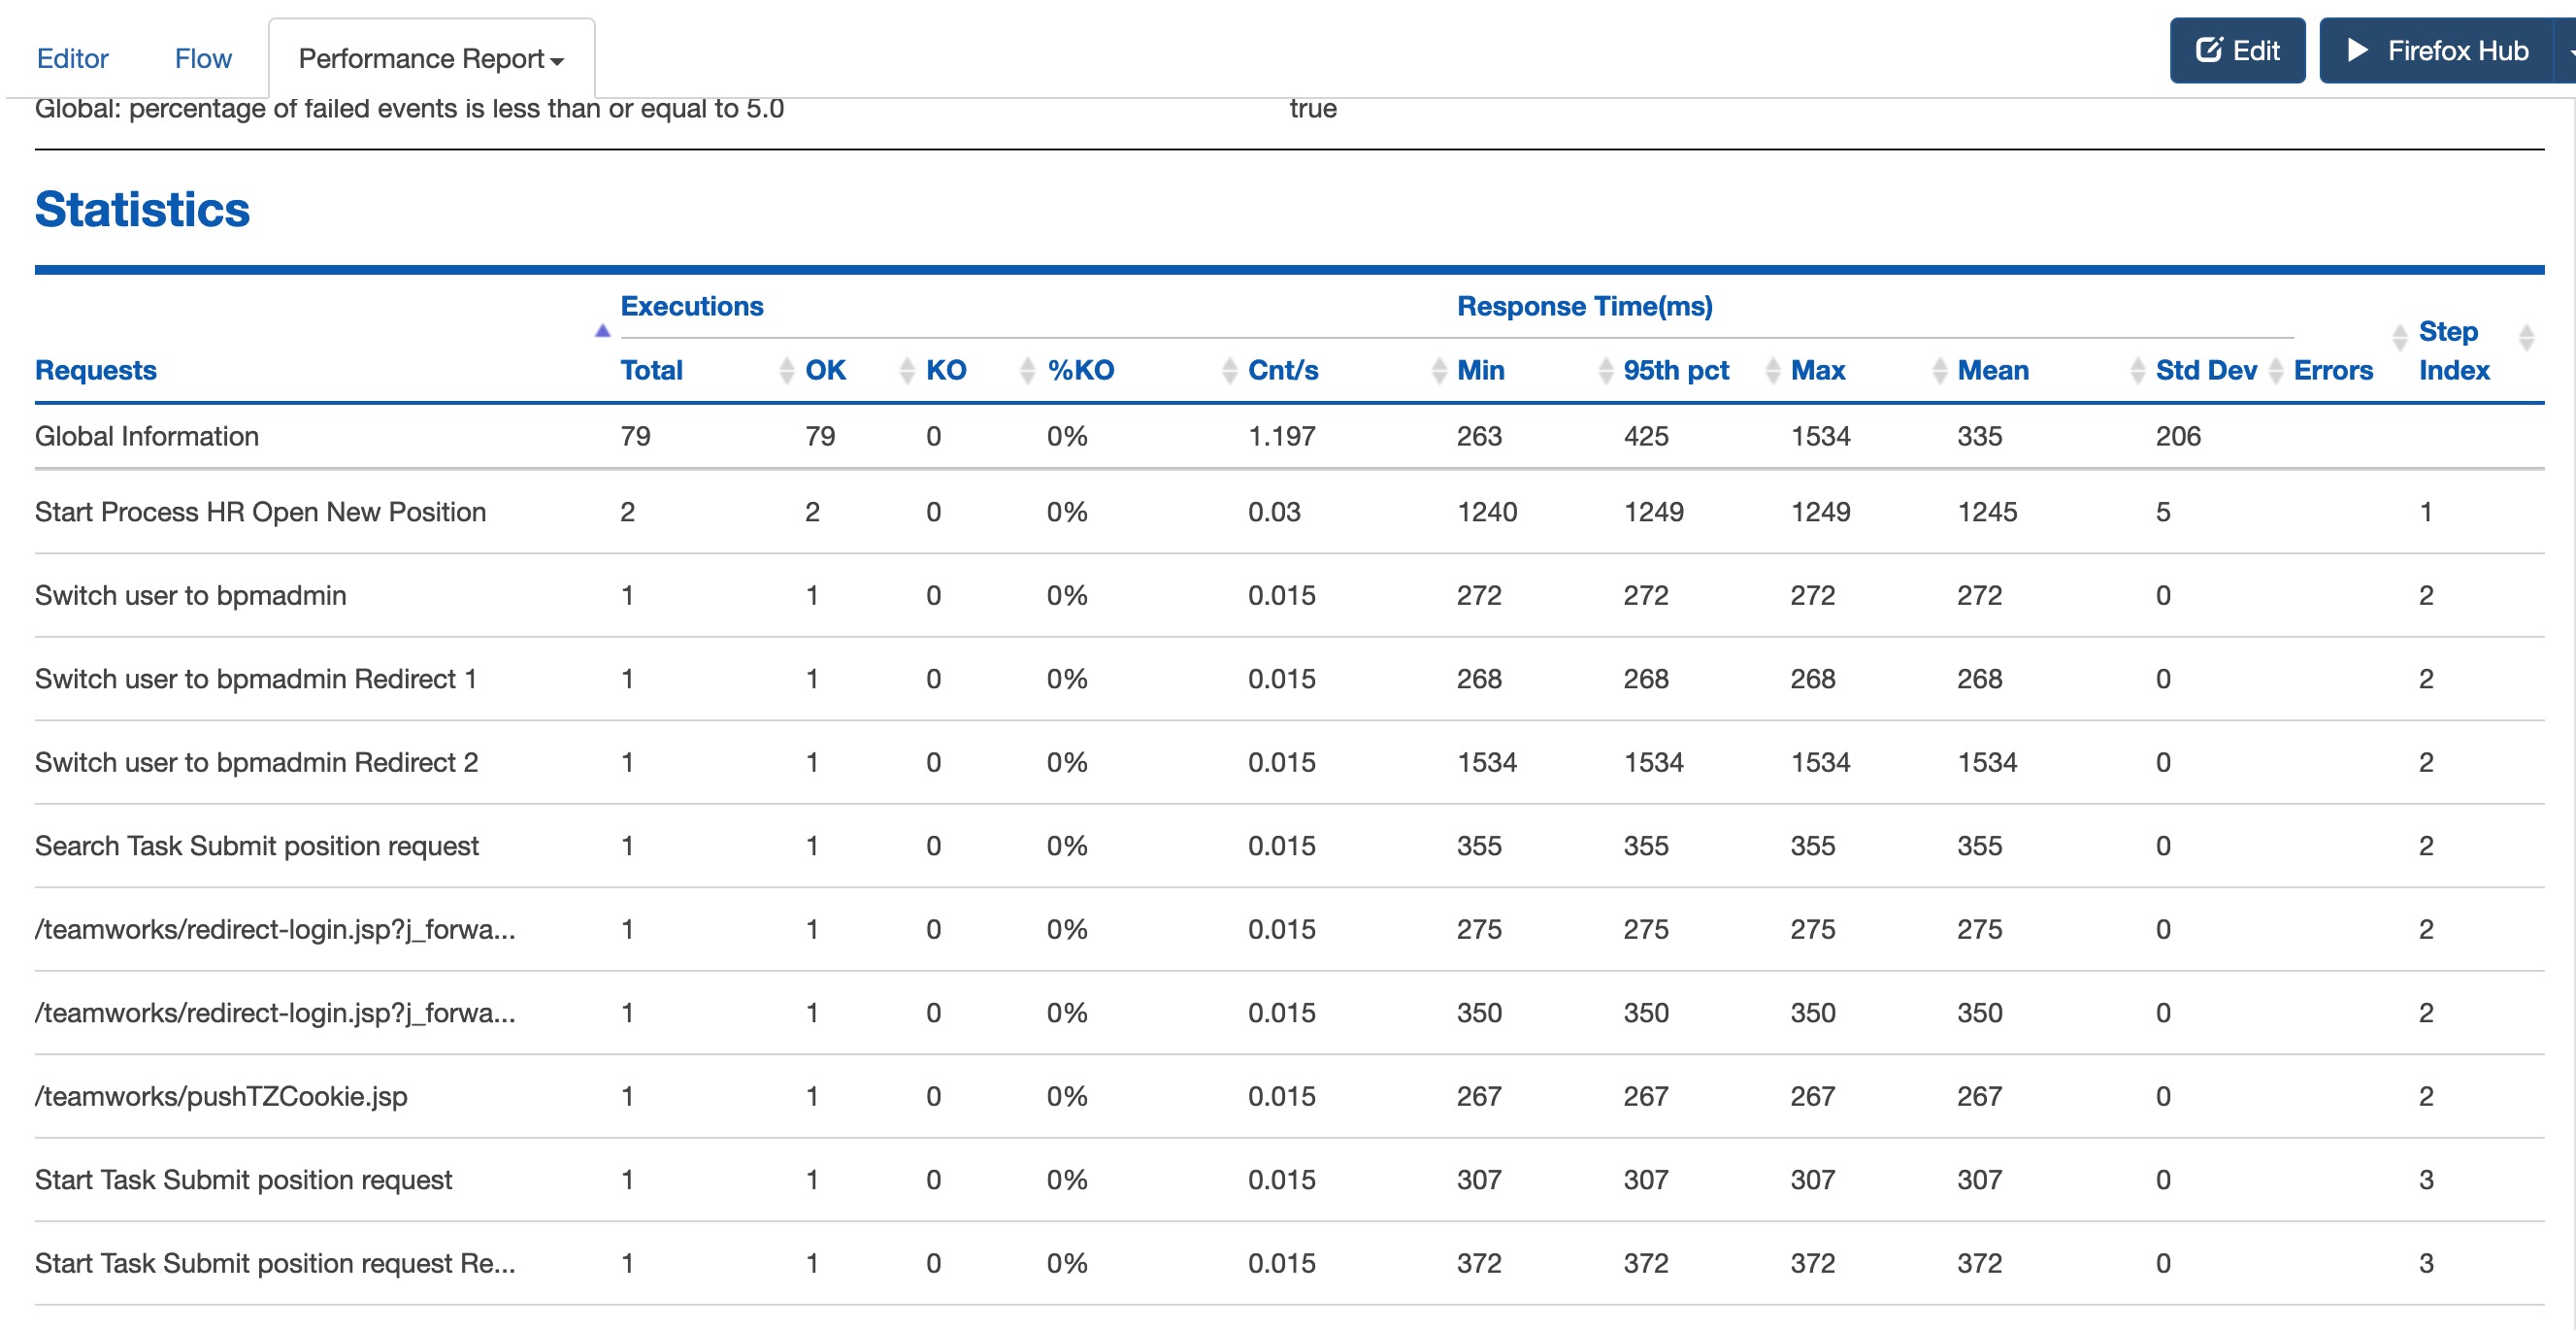
After the load test finishes, switch to view Performance Report.
Check Load Test Case Data
-
Sometimes when you click the Load Test button on the right of the case name, you might see some warnings on the page. If you see the screenshot below, it means the recorded network information is incorrect. You need to use the IDA plug-in to replay the test case again.

-
If you see the error below, it means your recorded load test data is out of sync. You also need to use the IDA plug-in to replay the test case again.

Note: The Load Test feature currently has the following limitations:
- Frequently used test commands in the BPM category are supported.
- Most test commands in the UI category are supported.
- Assertion and Utility commands are not supported yet.
