High Availability for IDA Application on WAS and IBM HTTP Server
Recommended topology
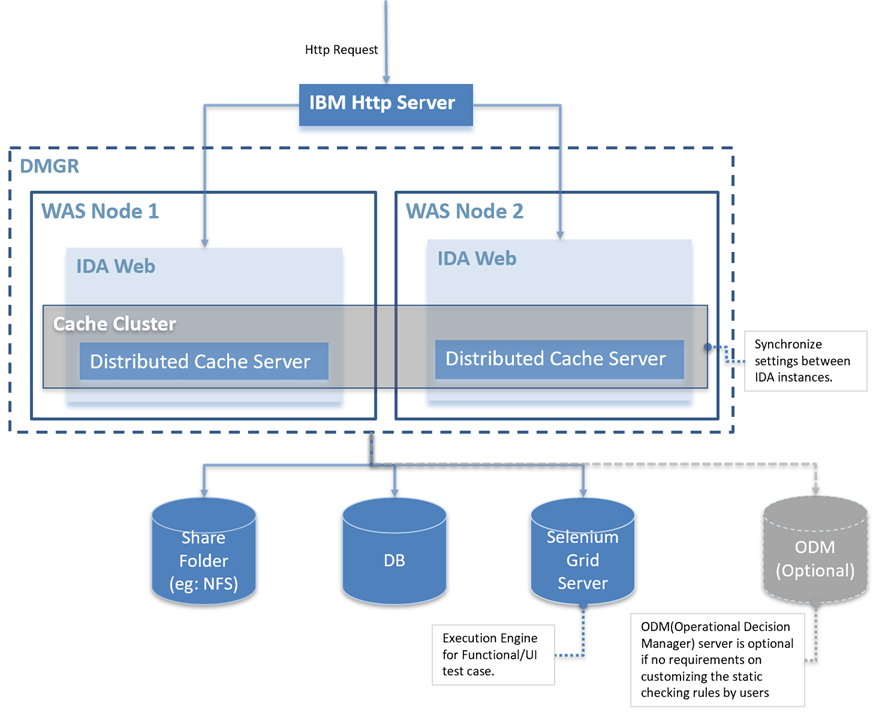
There are 2 parts for IDA application high availability we need to install and configure, including:
- High Availability configuring for IDA application on WAS
- HTTP Server setup
High Availability configuring for IDA Application on WAS V9
Prerequisite: Already set up a shared folder (e.g., NFS, NAS, etc.) on both node servers, e.g., /share-folder/ida-data
Step 1: Create DMGR and Node 1, add Node 1 to DMGR
## Create DMGR
/opt/IBM/WebSphere/bin/manageprofiles.sh -create -templatePath /opt/IBM/WebSphere/profileTemplates/management/ -profileName dmgr01 -nodeName <nodename> -cellName idahacell1 -hostName <hostname>  -enableAdminSecurity true -adminUserName <wasadmin> -adminPassword <password>

## Start DMGR
/opt/IBM/WebSphere/profiles/dmgr01/bin/startManager.sh

## Create Node1
/opt/IBM/WebSphere/bin/manageprofiles.sh -create -templatePath /opt/IBM/WebSphere/profileTemplates/managed/ -profileName ida01

## Add Node1 to DMGR
/opt/IBM/WebSphere/profiles/ida01/bin/addNode.sh ida-was-demo11.fyre.ibm.com -username <wasadmin> -password <password>

## Start Node
/opt/IBM/WebSphere/profiles/ida01/bin/startNode.sh
Optional command:
## Stop DMGR
/opt/IBM/WebSphere/profiles/dmgr01/bin/stopManager.sh -username <wasadmin> -password <password>

## Delete DMGR
/opt/IBM/WebSphere/bin/manageprofiles.sh -delete -profileName dmgr01
rm -rf /opt/IBM/WebSphere/profiles/dmgr01

 ## Stop Node1
 /opt/IBM/WebSphere/profiles/ida01/bin/stopNode.sh

## Delete Node1
/opt/IBM/WebSphere/bin/manageprofiles.sh -delete -profileName ida01
rm -rf /opt/IBM/WebSphere/profiles/ida01
Step 2: Create Node 2, add Node 2 to DMGR
## Create Node 2
/opt/IBM/WebSphere/bin/manageprofiles.sh -create -templatePath /opt/IBM/WebSphere/profileTemplates/managed/ -profileName ida02

## Add Node2 to DMGR
/opt/IBM/WebSphere/profiles/ida02/bin/addNode.sh ida-was-demo11.fyre.ibm.com -username <wasadmin> -password <password>

## Start Node
/opt/IBM/WebSphere/profiles/ida02/bin/startNode.sh
Step 3. Create a WAS cluster
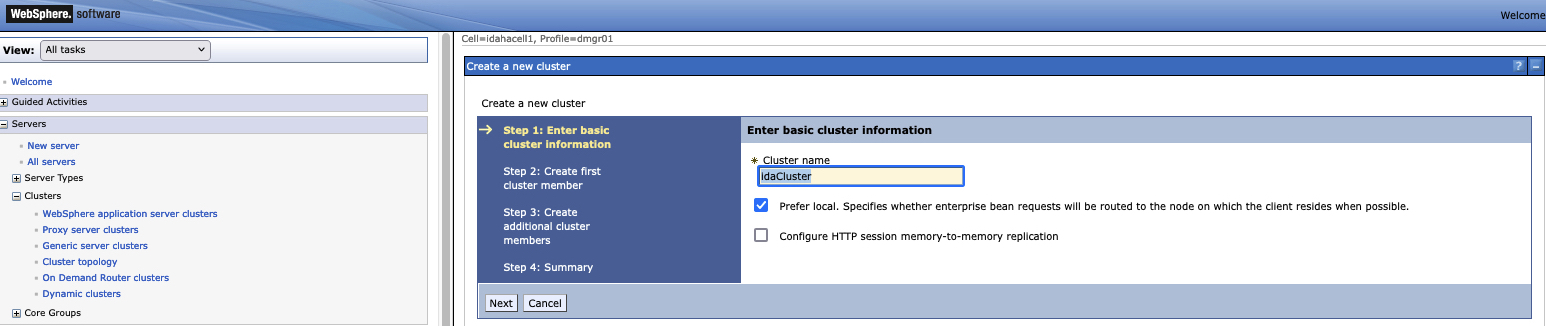
3.1 Go to Servers->Clusters->WebSphere application server clusters, click New, then input the cluster name, e.g., idaCluster, click Next.
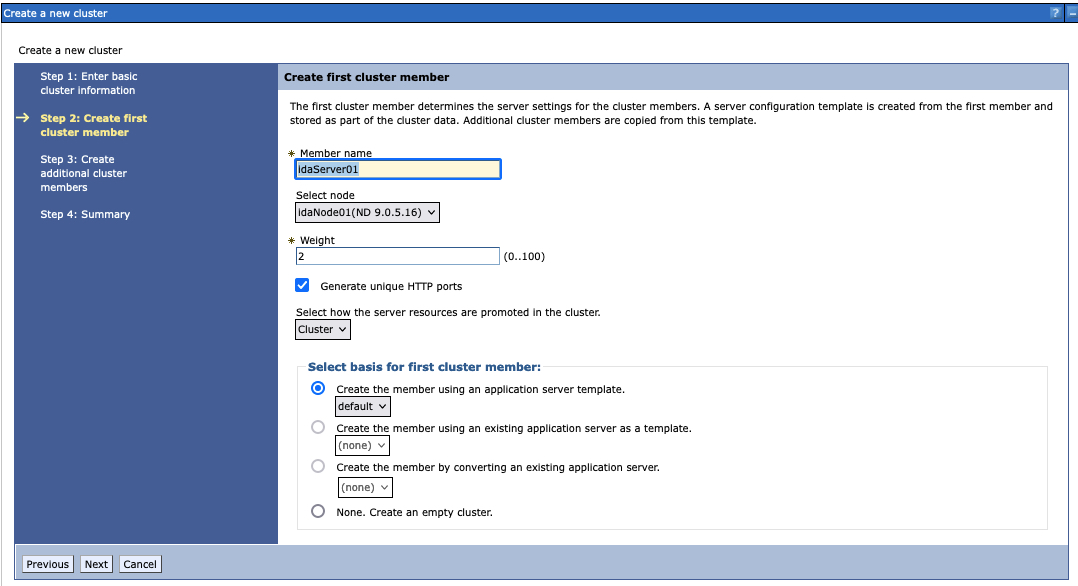
3.2 Input the first cluster member name, e.g., idaServer01, click Next.
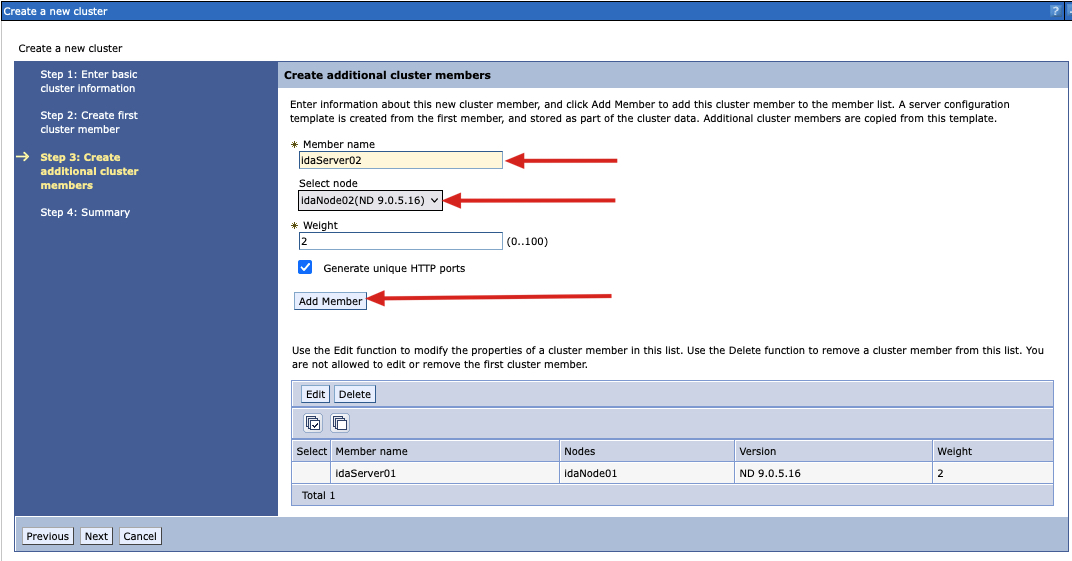
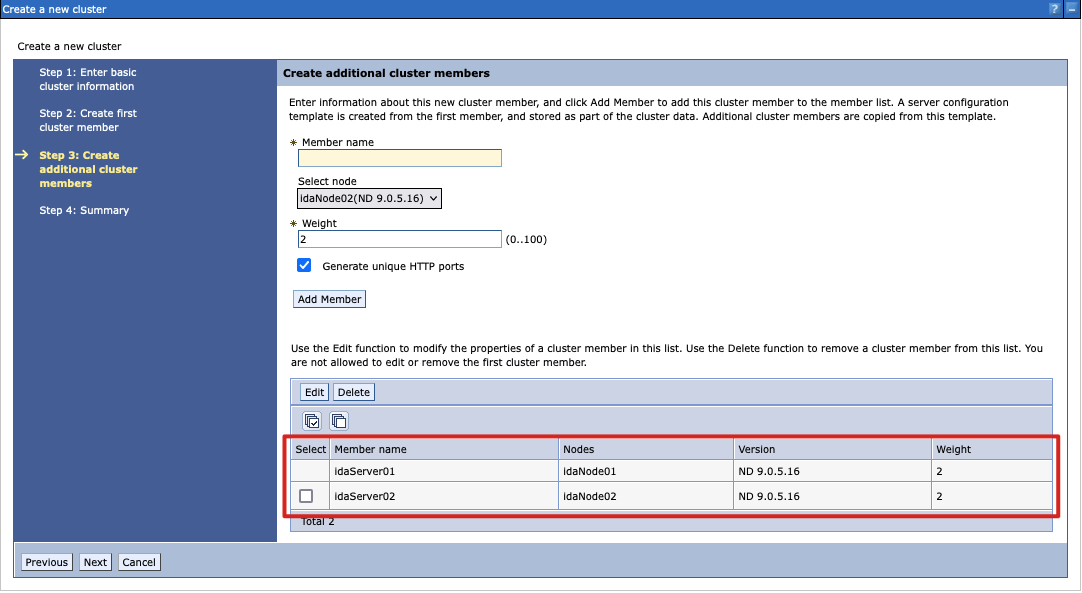
3.3 Input the second cluster member name, e.g., idaServer02, change Select node to be the other node, then click Add Member.
3.4 After adding the second cluster member, click Next, then click Finish.
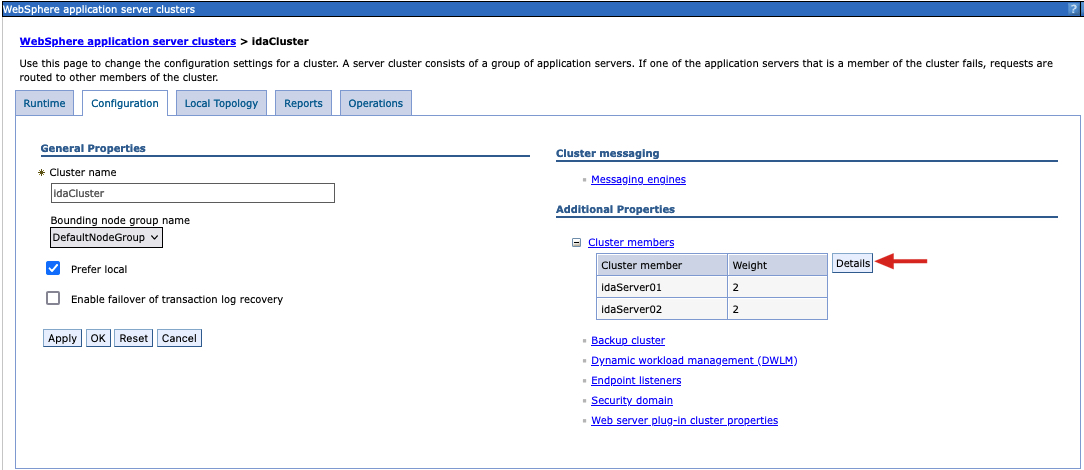
3.5 After saving the changes, click the cluster name, e.g., idaCluster, then click Cluster members->Details for step 2.
Step 4. Configurations for each cluster member
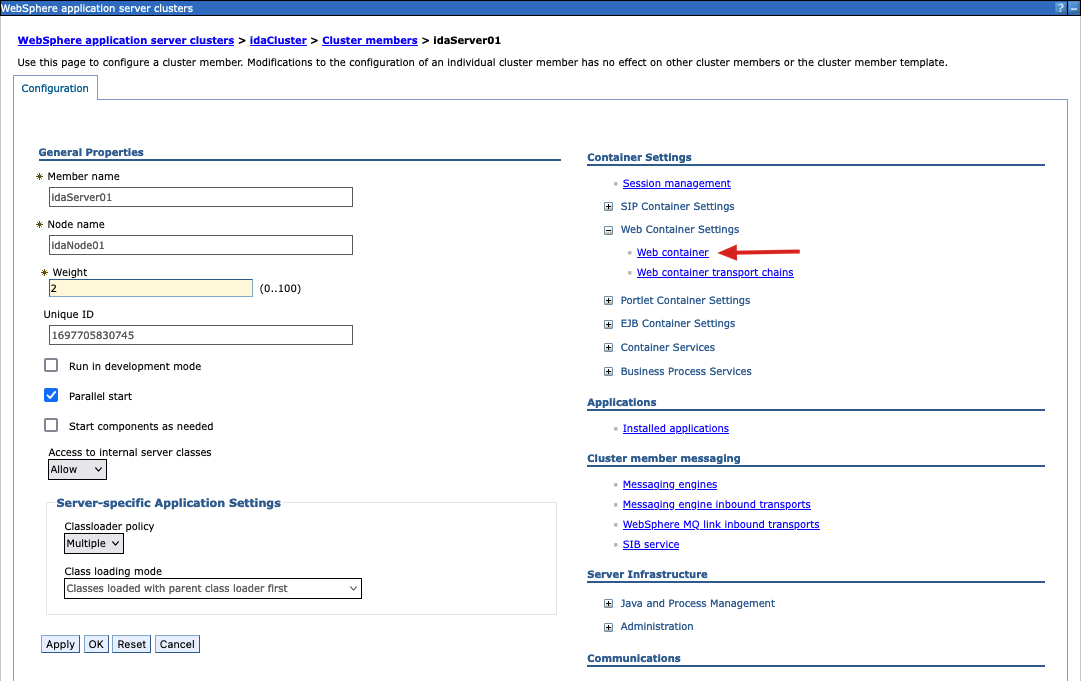
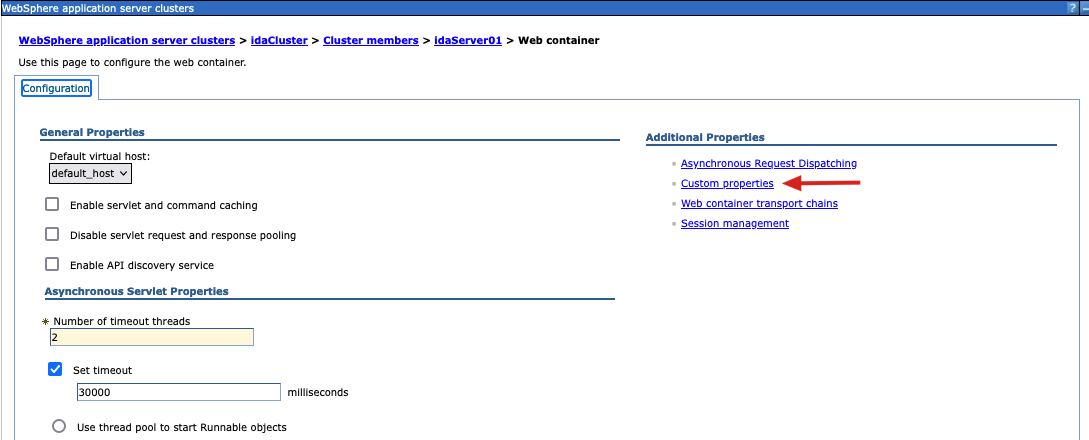
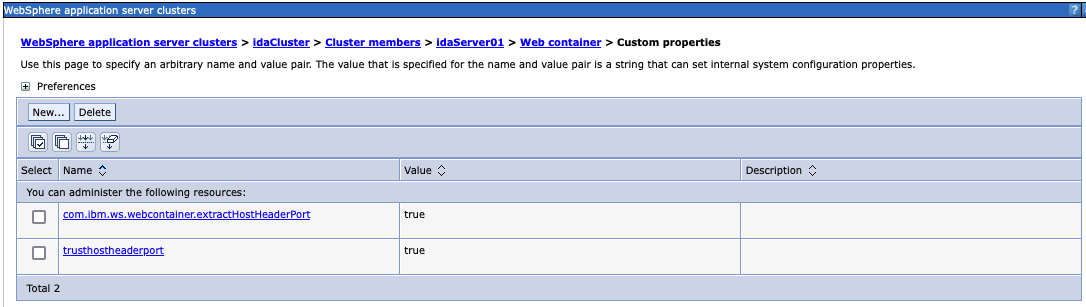
4.1 Click the first member, e.g., idaServer01, go to Web Container Settings->Web container->Custom properties, click New to create the following configurations:
| Name | Value |
|---|---|
| trusthostheaderport | true |
| com.ibm.ws.webcontainer.extractHostHeaderPort | true |
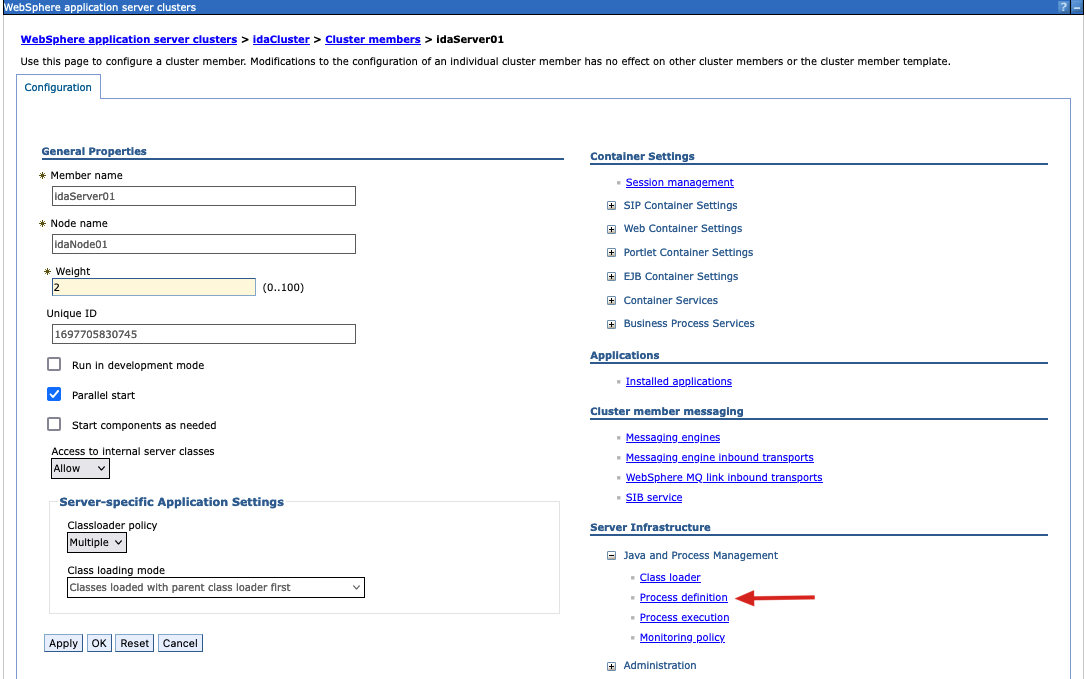
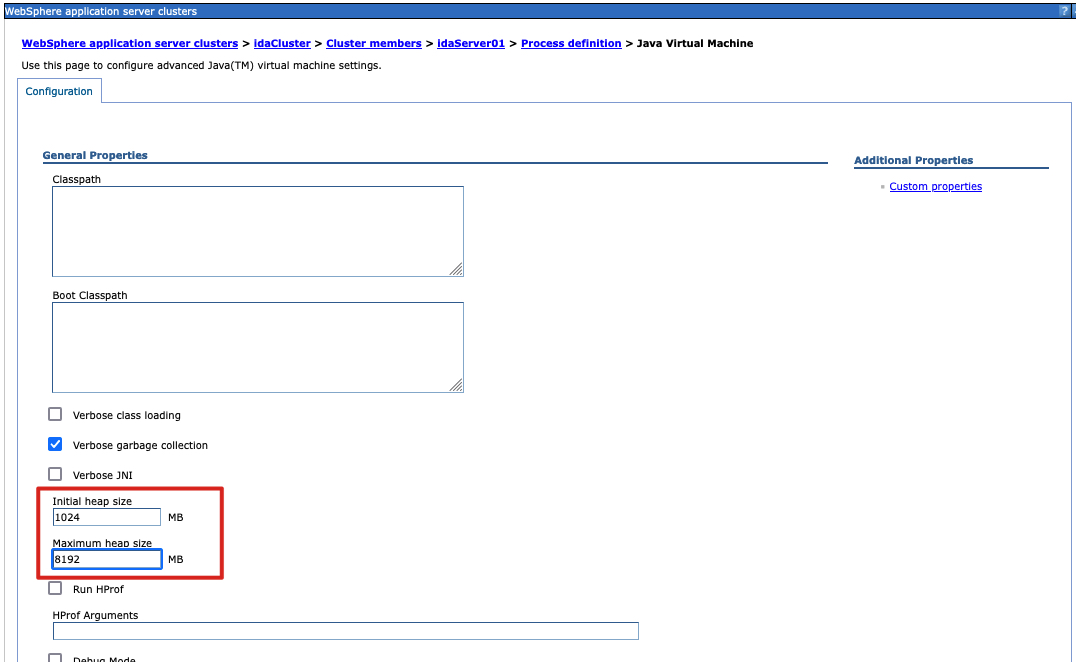
4.2 Go back to the first member, navigate to Process definition->Java Virtual Machine, input 1024 for Initial heap size, 8192 for Maximum heap size, then click Apply.
4.3 Go to Process definition->Environment Entries, click New to create the following configurations.
| Name | Value | Required/Optional |
|---|---|---|
| HAZELCAST_NETWORK_JOIN_TCP_IP_ENABLED | true | required |
| HAZELCAST_NETWORK_JOIN_TCP_IP_MEMBER | {your first WAS node IP} , {your second WAS node IP} | required |
| ORG_QUARTZ_JOBSTORE_DATASOURCE_ENABLED | true | required |
| ORG_QUARTZ_JOBSTORE_DRIVERDELEGATECLASS | org.quartz.impl.jdbcjobstore.PostgreSQLDelegate | optional, for PostgreSQL DB only |

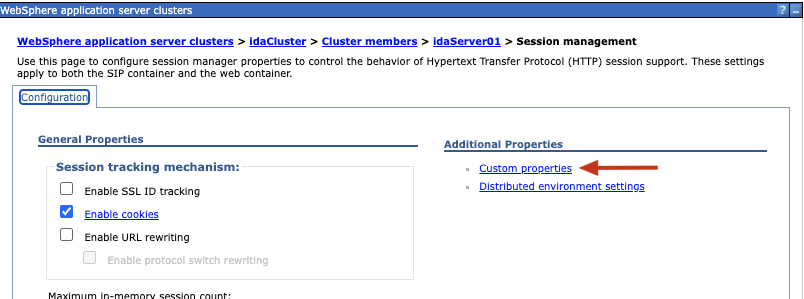
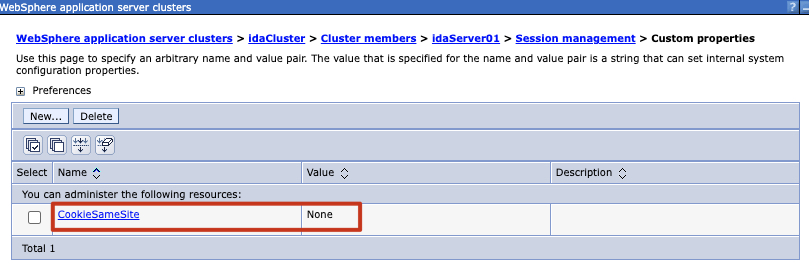
4.4 Click the first member, e.g., idaServer01, go to Session management > Custom properties, click New to create the configuration for CookieSameSite:None.
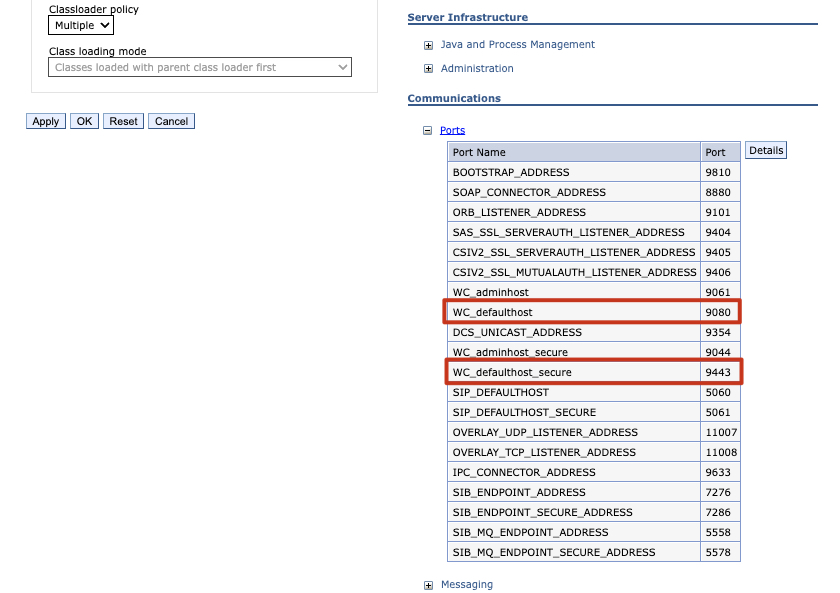
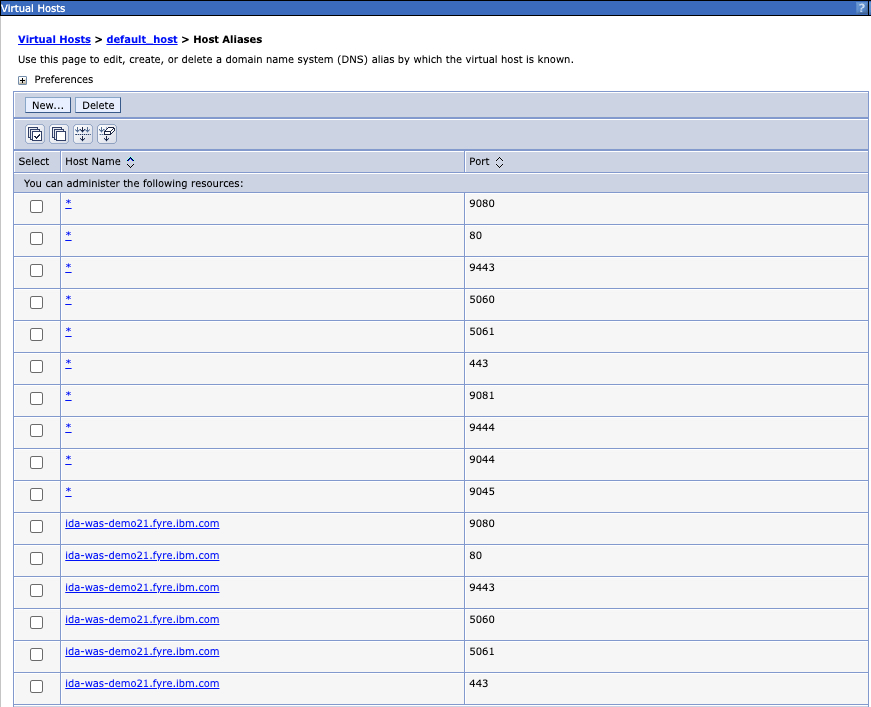
4.5 Make sure the host ports have been added to the Environment > Virtual hosts > default_host.
4.6 Repeat steps 4.1~4.5 for the second member, e.g., idaServer02.
Step 5. Configure the JNDI.
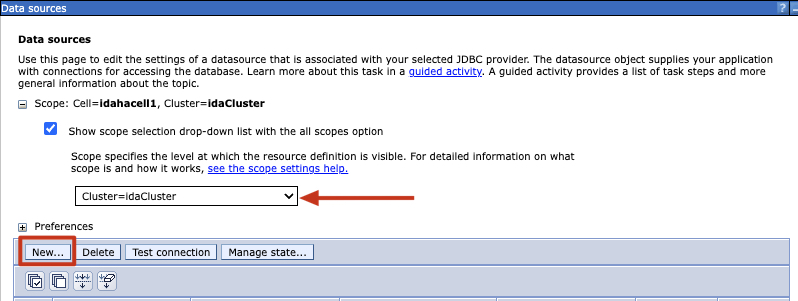
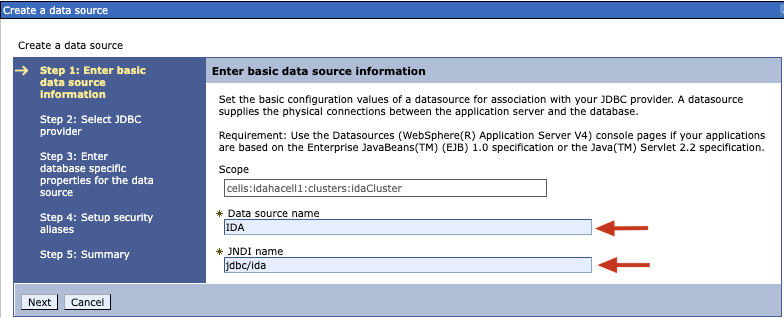
5.1 In the left navigation bar, click Resource > JDBC > Data sources, New datasource on the cluster, e.g., idaCluster.
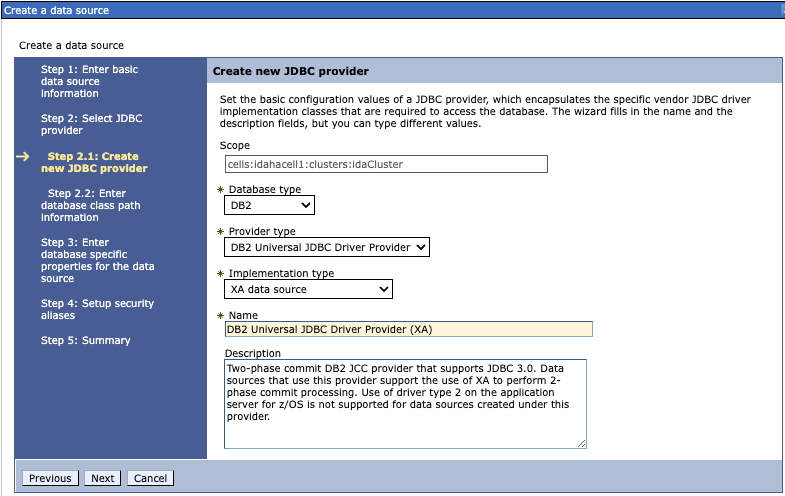
5.2 Create a new data source, we use DB2 as an example.
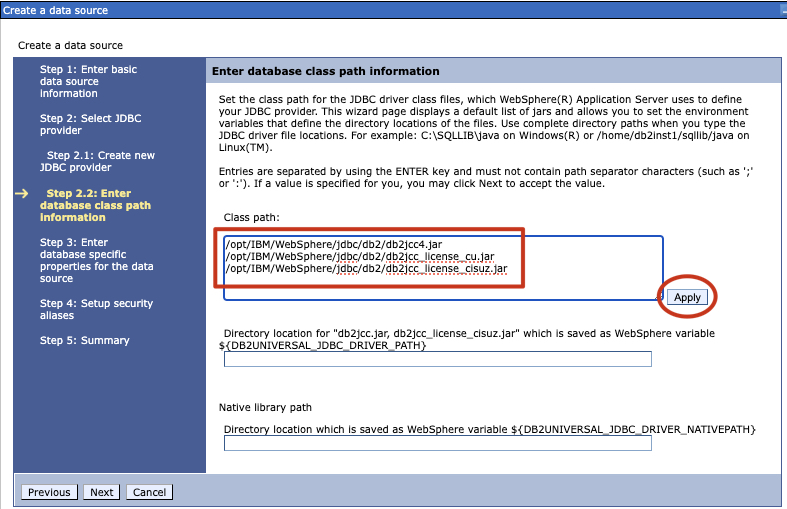
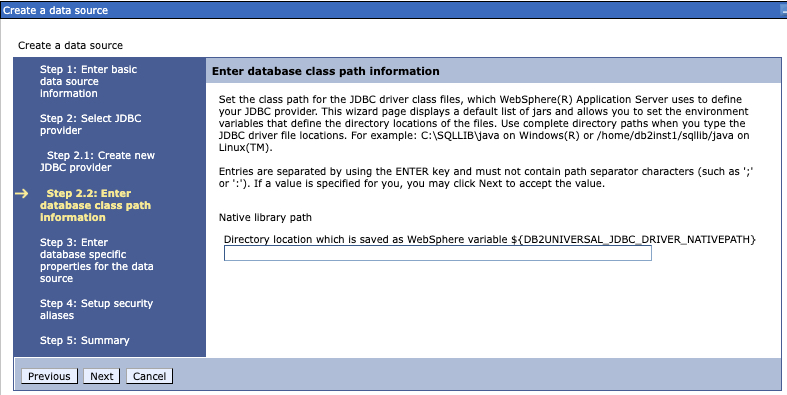
5.3 In step 2.2, update the JDBC driver class file paths and click Apply. Make sure they exist on each cluster member server. After applying, click Next.
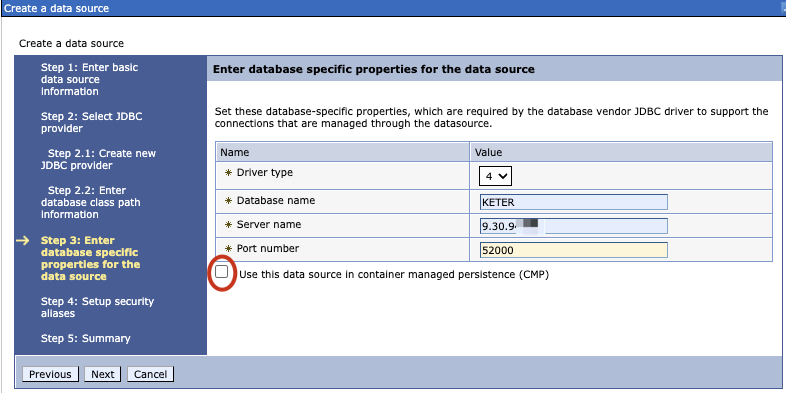
5.4 In step 3, fill in the database information, make sure to unselect the checkbox for Use this data source in container managed persistence (CMP), then click Next.
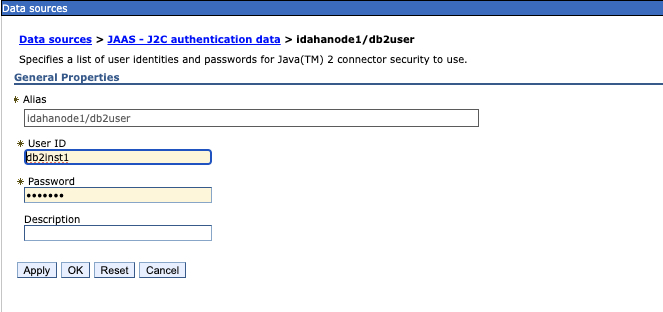
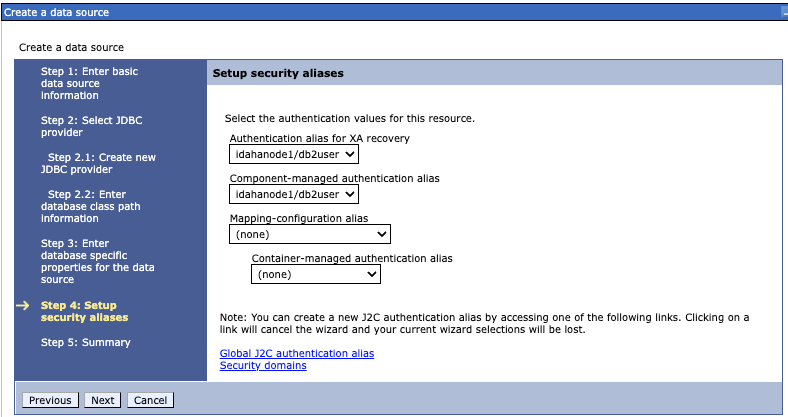
5.5 In step 4, create J2C authentication for the database, then use it in the datasource, click Next and Finish.
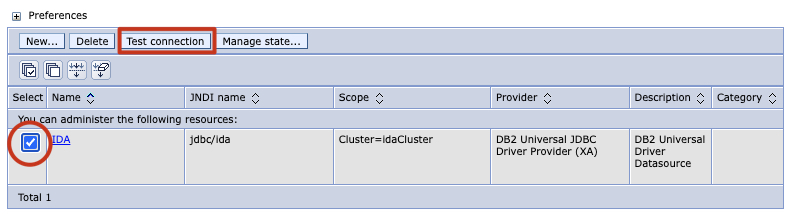
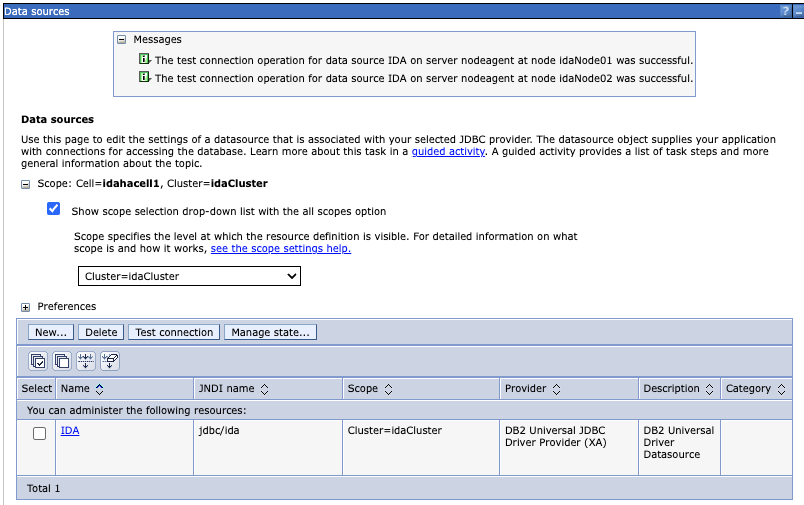
5.6 Test the datasource connection.
Step 6. Deploy IDA Application
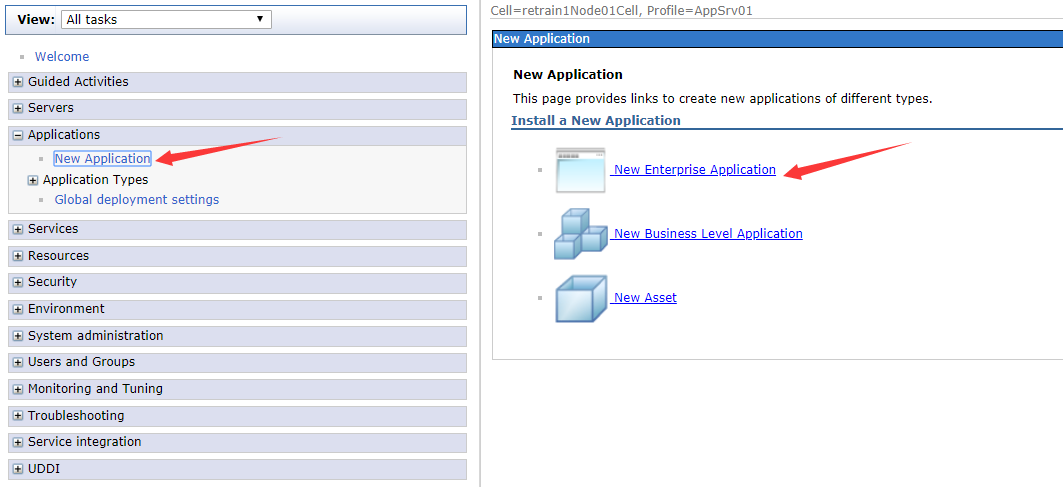
6.1 In the left navigation bar, click New Application > New Enterprise Application.
6.2 In the Path to the new application section, check the Local file system and select the ida-web.war from your local file system. When the war package is uploaded, click the Next button.

6.3 Choose the Fast Path option, and click the Next button.
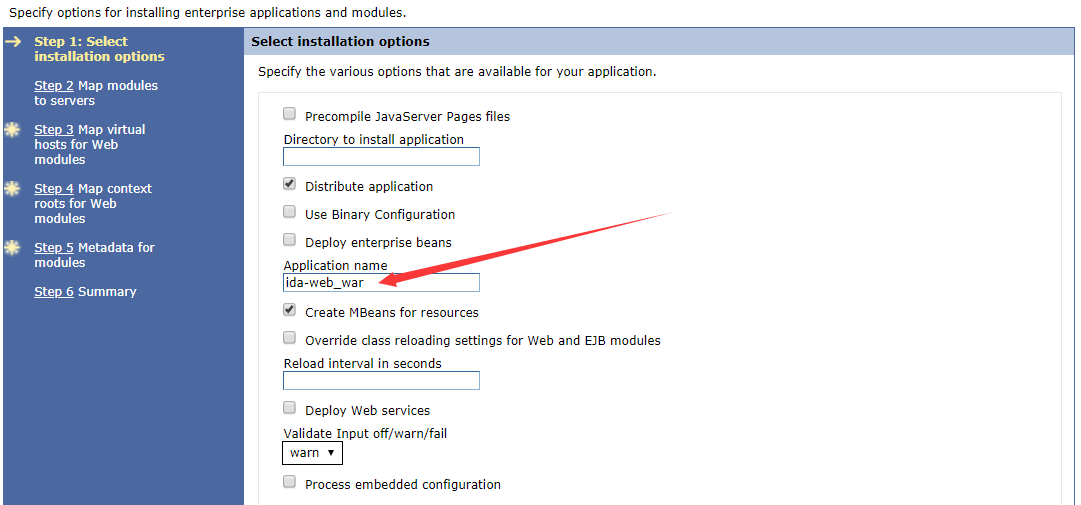
6.4 Now the current page is used to specify options for installing the enterprise application and modules. In step 1, you can change the application name, click the Next button after changing the application name.
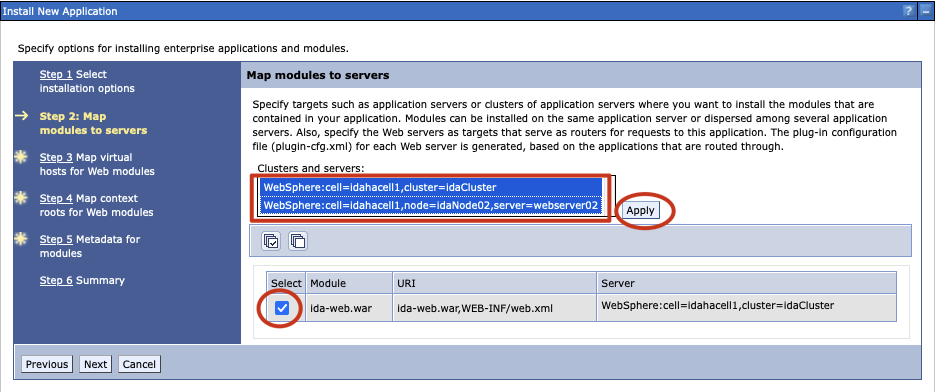
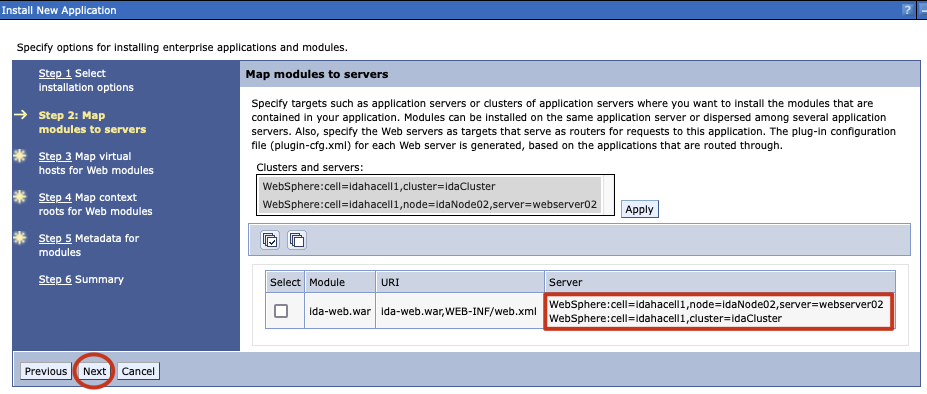
6.5 Need to select clusters and servers and click Apply in Step 2: Map modules to servers, then click Next.
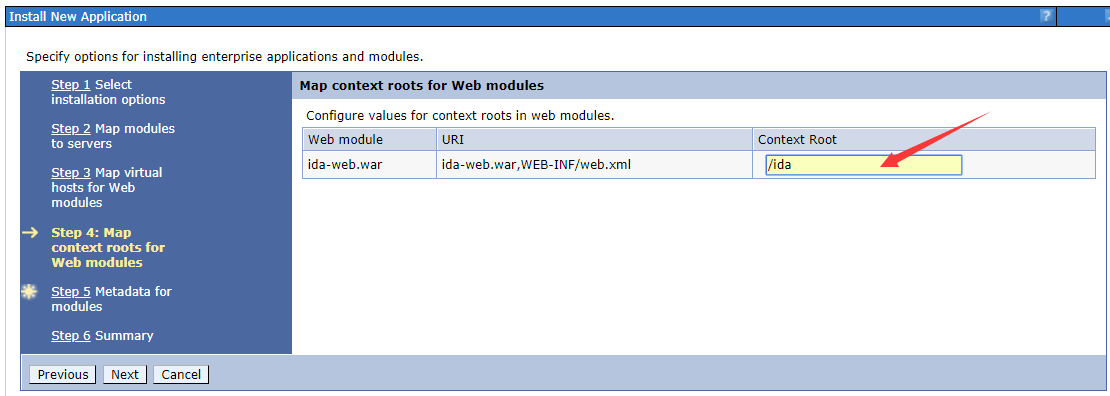
6.6 There is nothing to change in step 3. And step 4 is used to configure values for context root in web modules, we should set the Context Root as /ida as shown below.
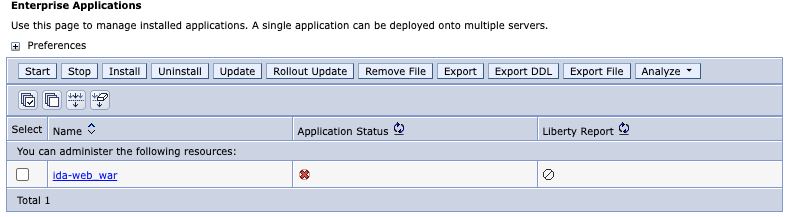
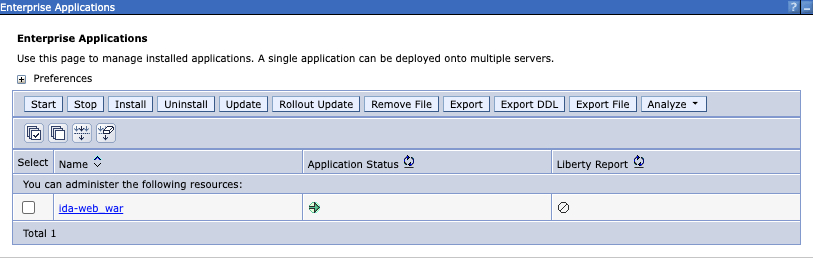
6.7 There is nothing to change in step 5. In step 6, click the Finish button and wait for the server to complete the installation of the IDA web application. When finished, click the WebSphere enterprise application in the left navigation bar, you can see that the IDA web application is in the Enterprise Applications table.
Step 7. Configure the Class Loader Order for IDA application
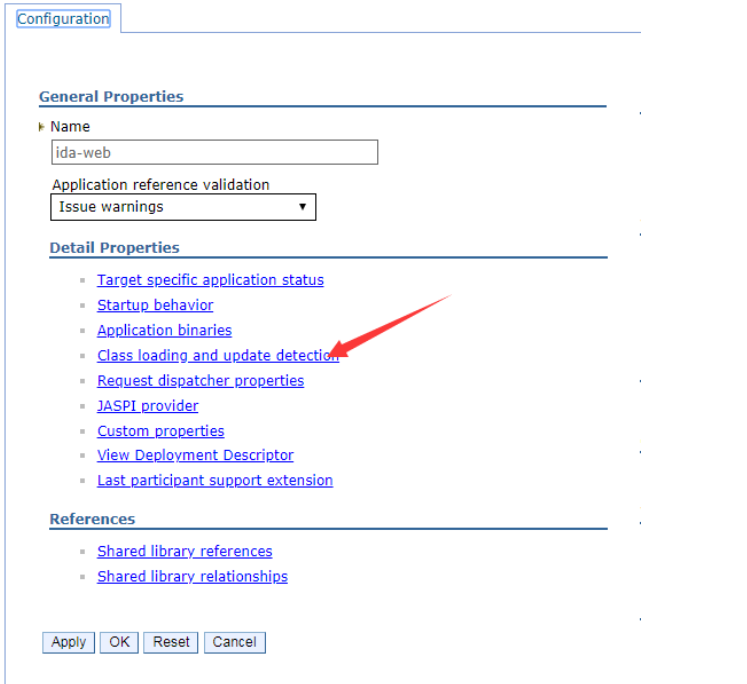
7.1 Click the link of the ida-web in the table and go to the app configuration page.
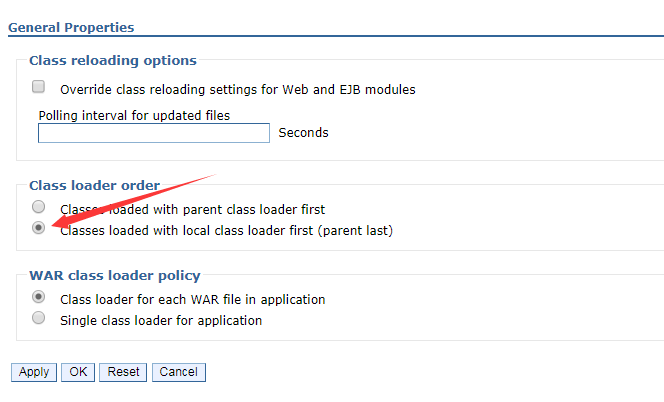
7.2 Click the Class loading and update detection link as shown below.
7.3 Change the class loader order to Classes loaded with local class loader first (parent last).
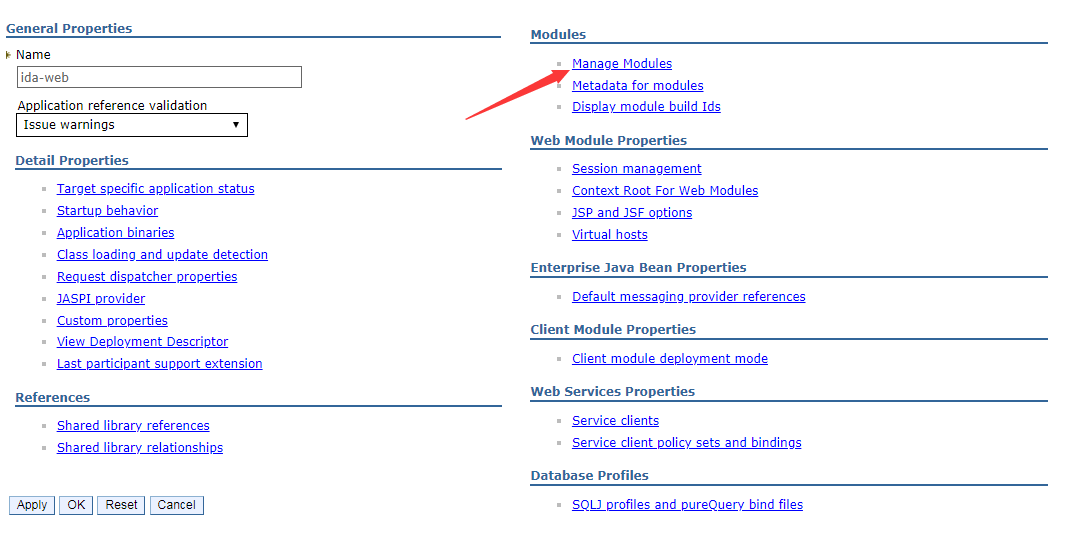
7.4 Then go back to the configuration page, and then click the Manage Modules link.
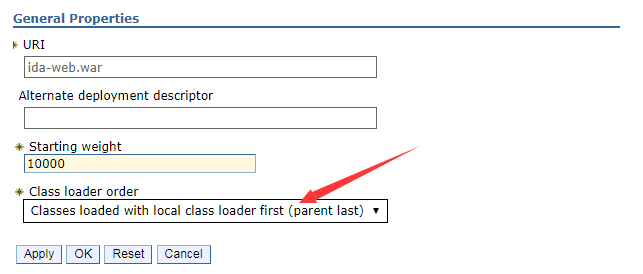
7.5 Click the link of ida-web.war, in the configuration page, change the class loader order to Classes loaded with local class loader first (parent last).
Step 8. Start IDA application
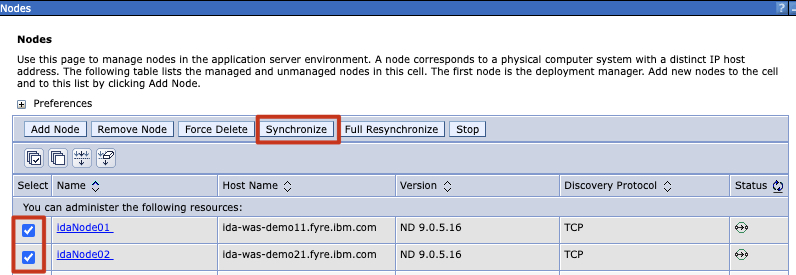
8.1 Before starting the IDA web application, go to System administration->Nodes, select 2 nodes to click Synchronize.
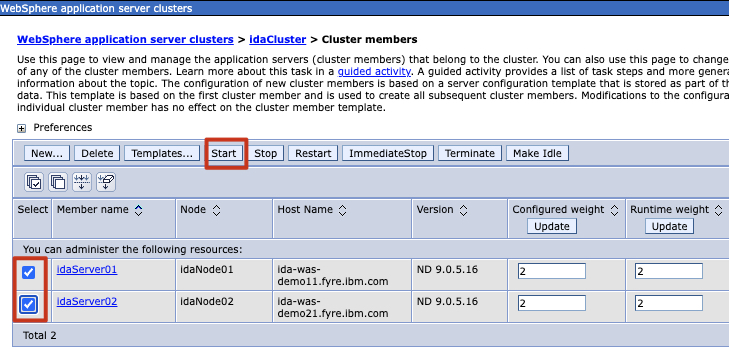
8.2 Go to WebSphere application server clusters > idaCluster > Cluster members to start the cluster members.
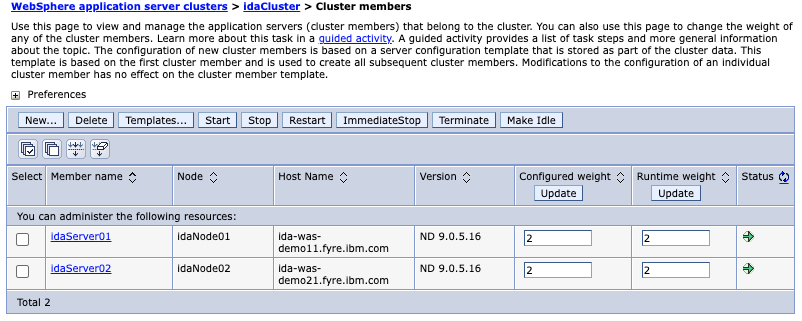
8.3 Go to WebSphere application server clusters to make sure the cluster started.

IBM HTTP Server setup
Prerequisite: Already have Installation media for IM, IHS, Plugin, JDK, and unzip them. If you don’t have them, please refer to V9.0.5: Download WebSphere Application Server Version 9.0.5 from Passport Advantage Online
For example:
# ls -ltr
total 2001688
-rw-r--r--  1 root root  251618518 Oct 23 19:31 was.repo.90501.ihs.zip
-rw-r--r--  1 root root  346545254 Oct 23 19:31 was.repo.90501.plugins.zip
-rw-r--r--  1 root root 1279626043 Oct 23 19:31 sdk.repo.8035.java8.linux.zip
-rw-r--r--  1 root root  171926710 Oct 23 19:31 gtk.x86_64_1.8.9004.20190423_2015.zip
drwxr-xr-x 11 root root       4096 Oct 23 21:06 im
drwxr-xr-x  9 root root        174 Oct 23 21:17 ihs9
drwxr-xr-x  9 root root        174 Oct 23 21:17 ihs-plugin
drwxr-xr-x  5 root root         95 Oct 23 21:18 java8
Step 1. Install IM
Go to the unzipped IM folder, e.g., ~/ihs/im, execute the following command to install IM.
cd ~/ihs/im/tools
~/ihs/im/tools/imcl install com.ibm.cic.agent -repositories ~/ihs/im/repository.config -installationDirectory /opt/IBM/IM -showVerboseProgress -log IM_Installation.log -acceptLicense
Step 2. Install IHS
Use ihs-response.xml to install IHS.
Note: The repository location in ihs-response.xml should be the unzipped path for ihs, ihs-plugin, and java. Update them if necessary.
ihs-response.xml:
<?xml version='1.0' encoding='UTF-8'?>
<agent-input>
  <variables>
    <variable name='sharedLocation' value='/opt/IBM/IMShared'/>
  </variables>
  <server>
    <repository location='/root/ihs/ihs-plugin'/>
    <repository location='/root/ihs/ihs9'/>
    <repository location='/root/ihs/java8'/>
  </server>
  <profile id='IBM HTTP Server V9.0' installLocation='/opt/IBM/HTTPServer'>
    <data key='cic.selector.arch' value='x86_64'/>
    <data key='user.ihs.http.server.service.name.key' value='IBMHTTPServerV9.0'/>
    <data key='user.ihs.http.server.service.name' value='IBM HTTP Server V9.0'/>
    <data key='user.ihs.win.serverServicePassword' value='XjTveChg5ba6olBVMK/Reg=='/>
    <data key='user.ihs.allowNonRootSilentInstall' value='true'/>
    <data key='user.ihs.win.serverServiceLogOnAsLocalSystem' value='true'/>
    <data key='user.ihs.win.serverServiceUser' value='root'/>
    <data key='user.ihs.httpPort' value='80'/>
  </profile>
  <install>
    <!-- IBM HTTP Server for WebSphere Application Server 9.0.5.1 -->
    <offering profile='IBM HTTP Server V9.0' id='com.ibm.websphere.IHS.v90' version='9.0.5001.20190828_0616' features='core.feature'/>
    <!-- IBM SDK, Java Technology Edition, Version 8 8.0.5.35 -->
    <offering profile='IBM HTTP Server V9.0' id='com.ibm.java.jdk.v8' version='8.0.5035.20190422_0948' features='com.ibm.sdk.8'/>
  </install>
  <profile id='Web Server Plug-ins for IBM WebSphere Application Server V9.0' installLocation='/opt/IBM/WebSphere/Plugins'>
    <data key='cic.selector.arch' value='x86_64'/>
  </profile>
  <install>
    <!-- Web Server Plug-ins for IBM WebSphere Application Server 9.0.5.1 -->
    <offering profile='Web Server Plug-ins for IBM WebSphere Application Server V9.0' id='com.ibm.websphere.PLG.v90' version='9.0.5001.20190828_0616' features='core.feature'/>
    <!-- IBM SDK, Java Technology Edition, Version 8 8.0.5.35 -->
    <offering profile='Web Server Plug-ins for IBM WebSphere Application Server V9.0' id='com.ibm.java.jdk.v8' version='8.0.5035.20190422_0948' features='com.ibm.sdk.8'/>
  </install>
  <preference name='com.ibm.cic.common.core.preferences.eclipseCache' value='${sharedLocation}'/>
</agent-input>
Step 3. Configuring IBM HTTP Server and IBM WebSphere Plug-In
3.1 Log in to the server as root.
3.2 Create an ihsmgr user and group.
groupadd -g 1511 ihsmgr
useradd -u 1511 -g 1511 ihsmgr
3.3 Run the following command to configure the admin server.
"/opt/IBM/HTTPServer/bin/setupadm" -usr ihsmgr -grp ihsmgr -cfg "/opt/IBM/HTTPServer/conf/httpd.conf" -adm "/opt/IBM/HTTPServer/conf/admin.conf"
Note: If you used a directory other than /opt/IBM/HTTPServer for the HTTP Server installation, ensure that you change the paths in the command to the correct paths for your environment.
3.4 Set the admin password:
"/opt/IBM/HTTPServer/bin/htpasswd" -b "/opt/IBM/HTTPServer/conf/admin.passwd" "ihsmgr" "<yourpassword>"
3.5 Set the admin port in the admin.conf file, e.g., 8008
sed -i s#@@AdminPort@@#"8008"#g "/opt/IBM/HTTPServer/conf/admin.conf"
Step 4. Defining IBM HTTP Server
4.1 Start the IBM HTTP Administration Server
cd /opt/IBM/HTTPServer/bin
./adminctl start
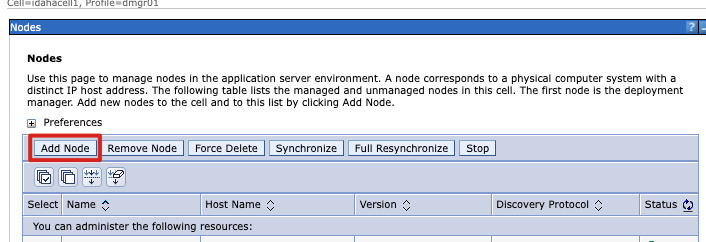
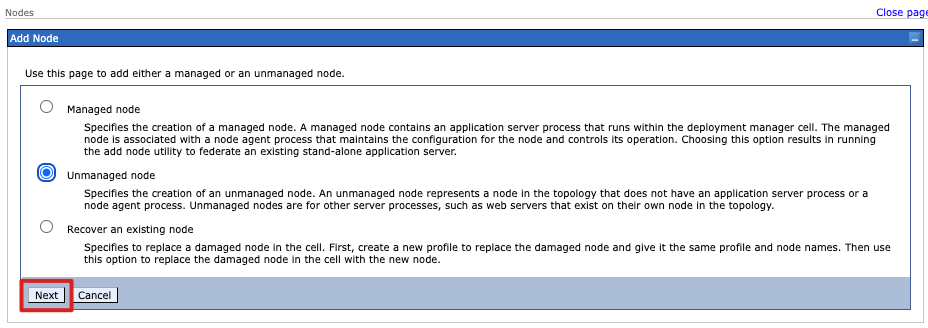
4.2 Log in to the WAS console on the Deployment Manager and select System administration > Nodes > Add Node.
4.3 Select Unmanaged node and click Next.
4.4 Specify the properties of the node by providing values in the following fields, then click OK and then click Save.
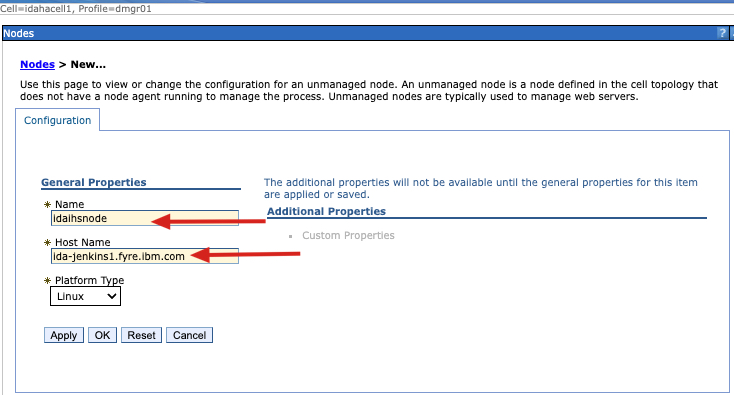
Note: Fill in the hostname of the IHS installed server for Host Name. You could use the following command to get the Linux server hostname:
/usr/bin/hostname
4.5 Select Servers > Server Types > Web servers and click New.
4.6 Provide values for the following fields:
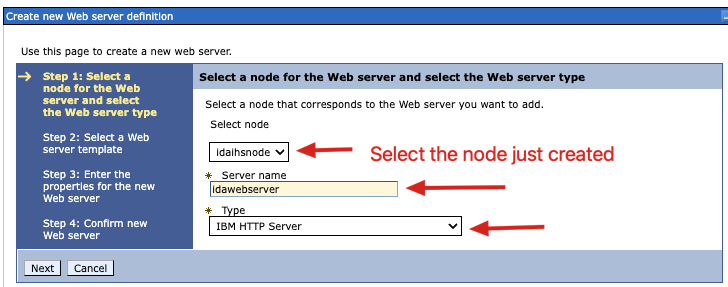
Note: For Select node, select the node that you specified in the previous step. For Type, select IBM HTTP Server.
4.7 Keep the default for step 2: select the default web server template for and click Next.
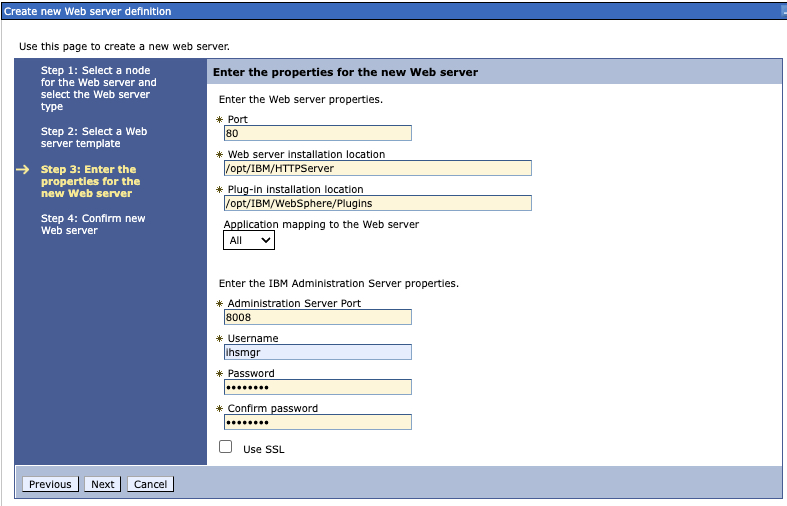
4.8 On the Step 3: Enter the properties for the new web server page, check the paths and make adjustments if necessary, and then enter the user name and password that you specified when you installed IBM HTTP Server. Confirm the password and click Next.
4.9 Click Finish and then click Save.
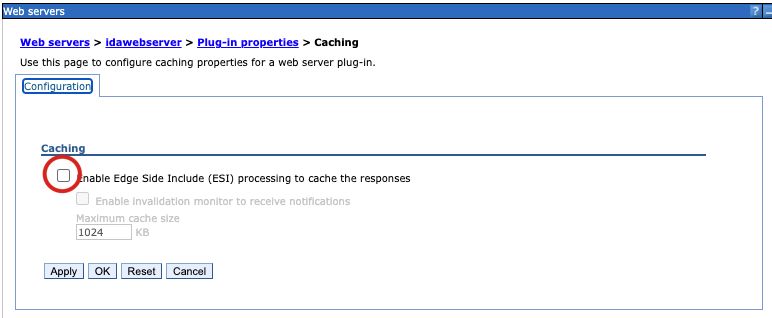
4.10 Disable Edge Side Include (ESI) cache by selecting Plug-in properties for your web server, and then selecting Caching and making sure to deselect Enable Edge Side Include (ESI) processing to cache the responses.

4.11 Synchronize all the nodes.
4.12 Create a folder on the HTTP server for your web server just created, and change the owner and group for this folder:
cd /opt/IBM/WebSphere/Plugins/config
mkdir <your web server name>
chown ihsmgr:ihsmgr <your web server name>
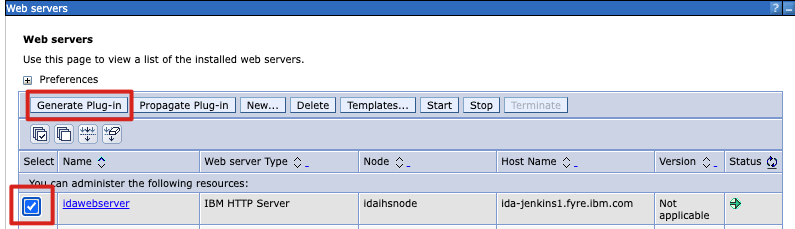
4.13 Select Servers > Server Types > Web servers and click the link to your web server.
4.14 Select the check box for your web server.
4.15 Click Generate Plug-in.
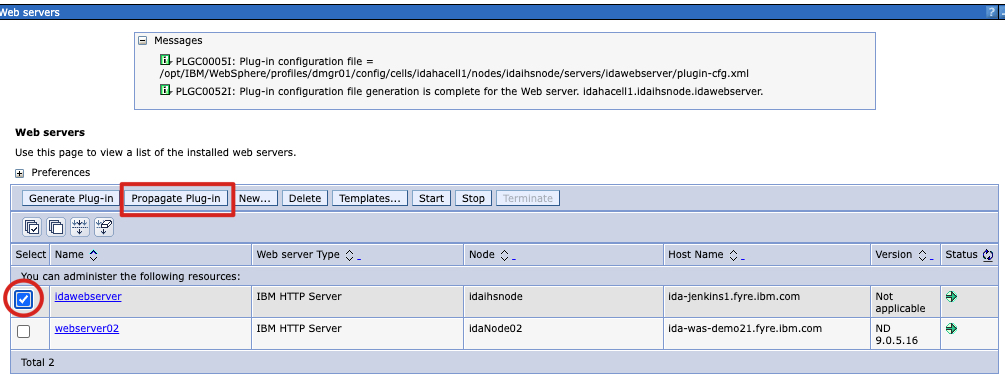
4.16 Select the check box for your web server.
4.17 Click Propagate Plug-in.
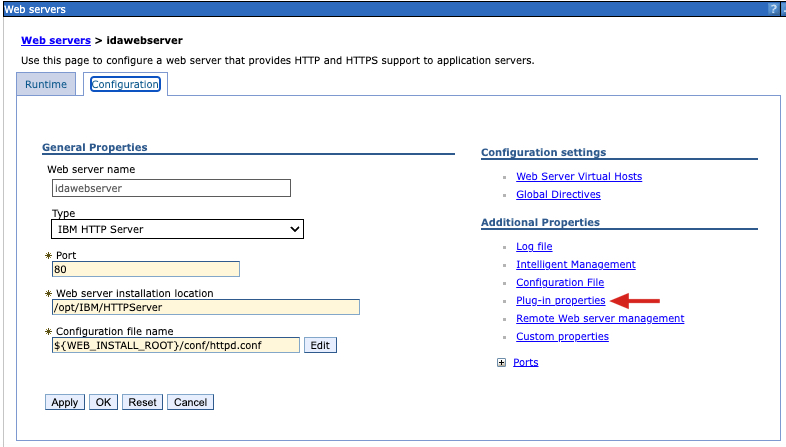
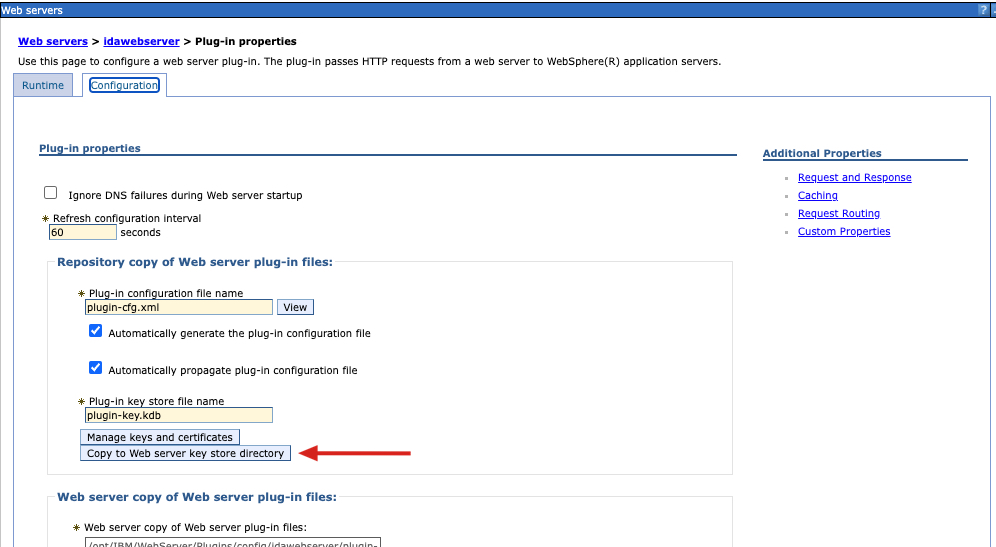
4.18 Select Servers > Server Types > Web servers and click the link to your web server.
4.19 Click Plug-in properties and then click Copy to Web Server key store directory.
4.20 Restart IBM HTTP Server
cd /opt/IBM/HTTPServer/bin
./adminctl stop
./adminctl start
Step 5. Enable IHS SSL
cd /opt/IBM/HTTPServer/conf

/opt/IBM/HTTPServer/bin/gskcmd -keydb -create -db key.kdb -pw <your password> -type cms -stash

/opt/IBM/HTTPServer/bin/gskcmd -cert -create -db key.kdb -pw <your password> -size 2048 -sig_alg SHA256WithRSA -dn CN=<your HTTP server hostname>,O=IBM,OU=IHS,L=RTP,ST=NC,C=US -label ihscert -default_cert yes -ca false

/opt/IBM/HTTPServer/bin/gskcmd -cert -extract -db key.kdb -pw <your password> -label ihscert -target cert.arm

/opt/IBM/HTTPServer/bin/gskcmd -cert -list -db key.kdb -pw <your password>
Add the following line into /opt/IBM/HTTPServer/conf/httpd.conf file, under LoadModule reqtimeout_module modules/mod_reqtimeout.so:
LoadModule ibm_ssl_module modules/mod_ibm_ssl.so
Add the following content into /opt/IBM/HTTPServer/conf/httpd.conf file under the Example SSL configuration part:
<IfModule mod_ibm_ssl.c>
  Listen 443
  <VirtualHost *:443>
    SSLEnable
  </VirtualHost>
</IfModule>
SSLDisable
KeyFile "/opt/IBM/HTTPServer/conf/key.kdb"
LoadModule was_ap22_module /opt/IBM/WebSphere/Plugins/bin/64bits/mod_was_ap22_http.so
WebSpherePluginConfig /opt/IBM/WebSphere/Plugins/config/<your web server name>/plugin-cfg.xml
Note: replace {your web server name} with your web server name created in step 4. Defining IBM HTTP Server.
Step 6. Restart HTTP Server
cd /opt/IBM/HTTPServer/bin
./apachectl stop
./adminctl stop

./adminctl start
./apachectl start
Step 7. Verify HTTP Server
Browse to https://{HTTP server ip or hostname}:443/ida